Skip to content
Your lash extensions look amazing on day one. By week two, they’re clumpy, dirty, and falling out. You’re frustrated because you paid good money for beautiful lashes that should last six weeks.
A complete lash cleaning kit gives you everything needed to keep extensions clean, fluffy, and lasting their full lifespan. This guide shows you exactly what components make an effective kit, how to use each product correctly, and which kit type matches your specific needs.
I’ve spent years helping lash clients maintain their extensions. The difference between extensions that last two weeks and those lasting eight weeks often comes down to one thing: proper cleaning with the right tools. Let me share what actually works.
Importance of Lash Care
Lash care determines how long your extensions last and how healthy they look. This isn’t just about appearance. It’s about hygiene, comfort, and protecting your investment.
Your eyes produce natural oils every day. Your skin sheds dead cells constantly. Makeup, dust, and environmental pollutants accumulate on your lashes. Without proper cleaning, all this buildup weakens the adhesive bond.
I see this pattern repeatedly. Clients come in after two weeks complaining about retention. When I examine their lashes, I find layers of oil and debris coating the extensions. The adhesive didn’t fail. The lack of cleaning caused premature loss.
Health Implications
Dirty lashes create real health risks. The warm, moist environment around your eyes becomes a breeding ground for bacteria when you don’t clean regularly.
Common problems from poor lash hygiene include:
- Blepharitis: Inflammation of the eyelid causing redness, itching, and crusty buildup
- Styes: Painful lumps that form when oil glands get infected
- Conjunctivitis: Pink eye from bacterial growth
- Demodex mites: Microscopic parasites that feed on dead skin and oils
- Allergic reactions: Irritation from accumulated debris
Sophie, one of my Canadian clients, developed chronic blepharitis. She couldn’t understand why. Her extensions were beautiful, but she never cleaned them. After starting a proper cleaning routine with a lash shampoo kit, her condition cleared up within two weeks.
Financial Benefits
Proper lash care saves money. Let me show you the numbers.
Average lash extension costs:
- Full set: $150-300
- 2-week fill: $75-150
- 4-week fill: $100-200
| Cleaning Routine | Typical Lifespan | Annual Cost |
|---|---|---|
| No cleaning | 2 weeks | $3,900 (26 fills) |
| Basic cleaning | 3 weeks | $2,600 (17 fills) |
| Proper cleaning with kit | 6-8 weeks | $900-1,200 (6-8 fills) |
A lash extension cleaning kit costs $20-40. It lasts 2-3 months. That’s a $3,000 annual savings for a $120 yearly investment in cleaning supplies.
Quality of Life
Clean lashes simply feel better. They stay fluffy and separated. They don’t itch. You don’t wake up with crusty eyes.
Your extensions look as good on week six as they did on day one. You feel confident knowing your lashes are clean and healthy.
Overview of Lash Cleaning Kits
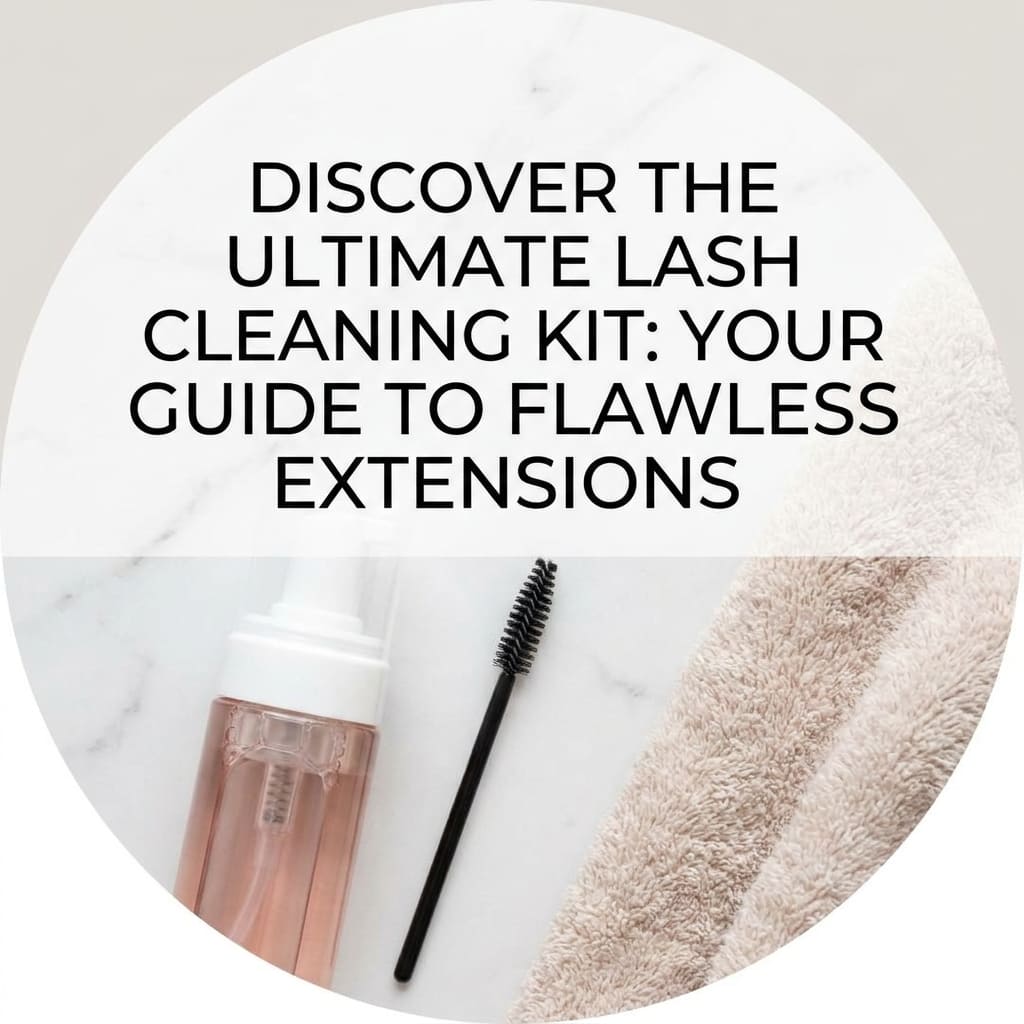
A lash cleaning kit bundles everything you need for proper lash hygiene. Instead of buying individual products and figuring out what works together, you get a complete system.
These kits solve a real problem. When I started in the lash business, clients asked me constantly: “What products should I buy?” They felt overwhelmed by options. A quality kit eliminates that confusion.
What Makes a Complete Kit
Every effective lash cleanser kit includes specific components:
Cleansing Product:
The foundation of any kit. This removes oils, makeup, and debris without damaging extensions or adhesive.
Application Tools:
Brushes or applicators designed specifically for lash extensions. These distribute product evenly and clean gently.
Accessories:
Supporting items like mixing cups, towels, or rinse bottles that make the cleaning process easier.
Instructions:
Clear guidance on proper technique. Even the best products fail if used incorrectly.
Quality Indicators
Not all kits deliver the same value. Look for these signs of quality:
Premium kits include:
- Oil-free formulations
- pH-balanced cleansers
- Soft, synthetic brushes
- Multiple application tools
- Detailed instructions
- Professional-grade products
Budget kits often have:
- Generic cleansers
- Harsh ingredients
- Poor quality brushes
- Minimal components
- Vague instructions
The price difference is typically $15-25. But the quality difference dramatically affects results.
Kit Sizes and Formats
Lash wash kits come in different sizes for different needs:
Individual Use (1-2 months):
- 50ml cleanser
- 1 brush
- Basic accessories
- Perfect for trying a routine
Standard Size (2-3 months):
- 100ml cleanser
- 2-3 brushes
- Complete accessories
- Best value for regular users
Professional Size (6+ months):
- 250ml+ cleanser
- Multiple tools
- Extra accessories
- Designed for lash technicians
I recommend starting with a standard size. It gives you enough product to establish a routine without excessive upfront cost.
Types of Lash Cleaning Kits
Different kits serve different purposes. Understanding these differences helps you choose correctly.
Lash Shampoo Kits
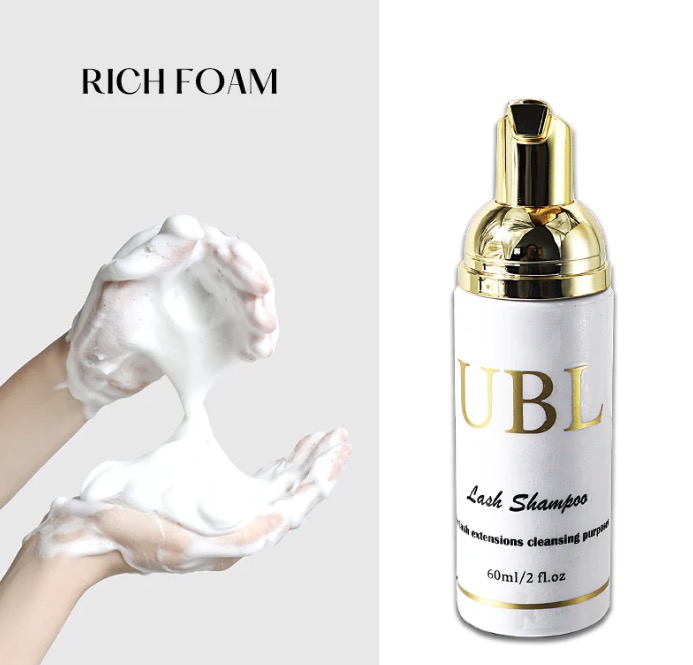
Lash shampoo kits focus on deep cleaning power. They include foaming cleansers that lift away stubborn buildup.
These kits typically contain:
- Foaming lash shampoo (50-100ml)
- Soft cleansing brush
- Foam pump or mixing cup
- Rinse bottle
- Instructions
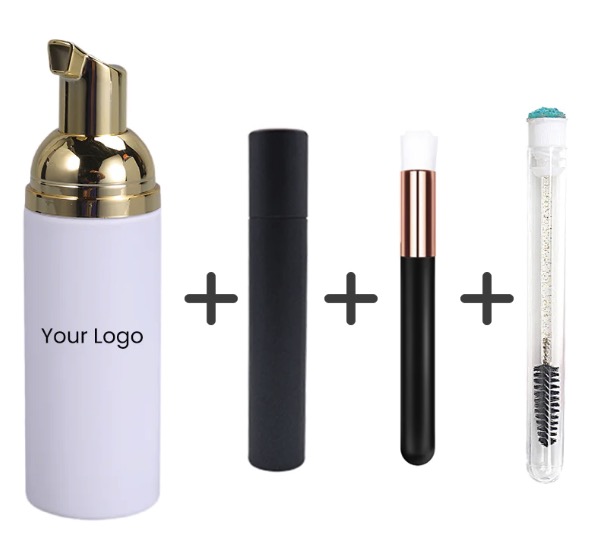
The shampoo creates a rich lather that penetrates between extensions. It breaks down oils and makeup without harsh scrubbing.
Best for:
- Daily maintenance
- Oily skin types
- Makeup wearers
- Deep weekly cleaning
Key ingredients to look for:
- Tea tree oil (natural antibacterial)
- Chamomile (soothing)
- Panthenol (strengthening)
- Coconut-derived surfactants (gentle cleaning)
The foam texture makes these kits very user-friendly. You can see where you’ve applied product. The lather provides cushion that prevents rough treatment of delicate extensions.
Eyelash Cleaning Kit
An eyelash cleaning kit offers versatility. These kits work for both extensions and natural lashes.
Standard components include:
- Gentle liquid cleanser
- Multiple brush types
- Spoolie for combing
- Cleansing pads
- Storage case
This type appeals to people who sometimes wear extensions and sometimes don’t. You’re not locked into extension-specific products.
Best for:
- Occasional extension wearers
- People transitioning to extensions
- Those wanting multi-purpose products
- Travel situations
Advantages:
- More flexible use
- Often more economical
- Suitable for sensitive eyes
- Easy to find replacements
Disadvantages:
- May not be optimized for extensions
- Less specialized cleaning power
- Might contain oils in some formulations
I keep an eyelash wash kit in my travel bag. It works for extensions, strip lashes, or natural lashes depending on what I’m wearing.
Lash Extension Cleaning Kit
A lash extension cleaning kit is specifically formulated for synthetic lash extensions. Every component is designed with extension safety in mind.
Professional-grade kits include:
- Extension-safe cleanser (pH balanced)
- Ultra-soft extension brushes
- Foam cleansing brush
- Lint-free towels
- Detailed usage guide
- Often includes after-care serum

These kits use formulations that preserve adhesive bonds while removing debris. The pH balance typically matches natural tears (around 7.4).
Best for:
- Full-time extension wearers
- Volume or mega volume sets
- Anyone serious about retention
- Professional lash artists
Premium features:
| Feature | Benefit | Worth It? |
|---|---|---|
| Medical-grade ingredients | Hypoallergenic, safe | Yes |
| Multiple brush types | Versatile cleaning | Yes |
| After-care serum | Conditions and protects | Optional |
| Travel sizes included | Convenient | Nice to have |
| Refillable containers | Eco-friendly, economical | Yes |
Specialized Kits
Some companies offer targeted solutions:
Sensitive Eye Kits:
Fragrance-free formulations with extra-gentle ingredients. Perfect if you have allergies or reactive eyes.
Makeup Removal Kits:
Include pre-cleaners that remove makeup before lash washing. Essential if you wear heavy eye makeup.
Travel Kits:
TSA-approved sizes with compact packaging. Everything fits in a small pouch for trips.
Professional Salon Kits:
Bulk sizes with multiple tools for treating many clients. Include sanitation supplies.
Choosing Your Kit Type
Your lifestyle determines the best kit type:
If you wear extensions full-time: Get a dedicated lash extension wash kit
If you’re trying extensions: Start with a standard eyelash cleaning kit
If you wear makeup daily: Choose a kit with pre-cleaner
If you travel frequently: Invest in a good travel kit
If you’re a professional: Buy professional bulk sizes
I use different kits for different situations. My daily kit stays in my bathroom. My travel kit lives in my carry-on. My professional kit serves salon clients.
Key Components of a Lash Cleaning Kit
Understanding each component helps you evaluate kit quality and use products correctly.
Lash Cleanser Products
The cleanser is your kit’s workhorse. It does the actual cleaning.
Foam Cleansers:
These come as thick foam or create foam when pumped. They’re the most popular type for extensions.
Benefits:
- Easy to apply evenly
- Visual confirmation of coverage
- Gentle on extensions
- Rinses cleanly
Application: Pump foam directly onto brush or into palm. Work through lashes gently.
Liquid Cleansers:
These look like water or thin gel. They require mixing or specific application techniques.
Benefits:
- Concentrated formula
- More economical
- Lightweight feel
- Professional favorite
Application: Mix with water in provided cup. Use brush to apply to lashes.
Gel Cleansers:
Thick, clear gels that provide cushioned cleaning.
Benefits:
- Controlled application
- Won’t drip
- Thorough cleaning
- Good for beginners
Application: Apply small amount to brush. Work through lashes systematically.
Ingredient Standards
Quality cleansers avoid these harmful ingredients:
Never use products containing:
- Oils (breakdown adhesive)
- Glycols (damage extensions)
- Sulfates (too harsh)
- Alcohol (drying)
- Fragrances (irritating)
Look for these beneficial ingredients:
| Ingredient | Purpose | Benefits |
|---|---|---|
| Tea tree oil | Antibacterial | Fights mites and bacteria |
| Chamomile | Soothing | Reduces irritation |
| Panthenol (Pro-Vitamin B5) | Conditioning | Strengthens natural lashes |
| Sodium chloride | Cleansing | Gentle, effective |
| Purified water | Base | Prevents contamination |
The ingredient list should be short and recognizable. If you see chemicals you can’t pronounce, research them before buying.
Applicators and Brushes
Brushes deliver the cleanser to your lashes. Different brush types serve different functions.
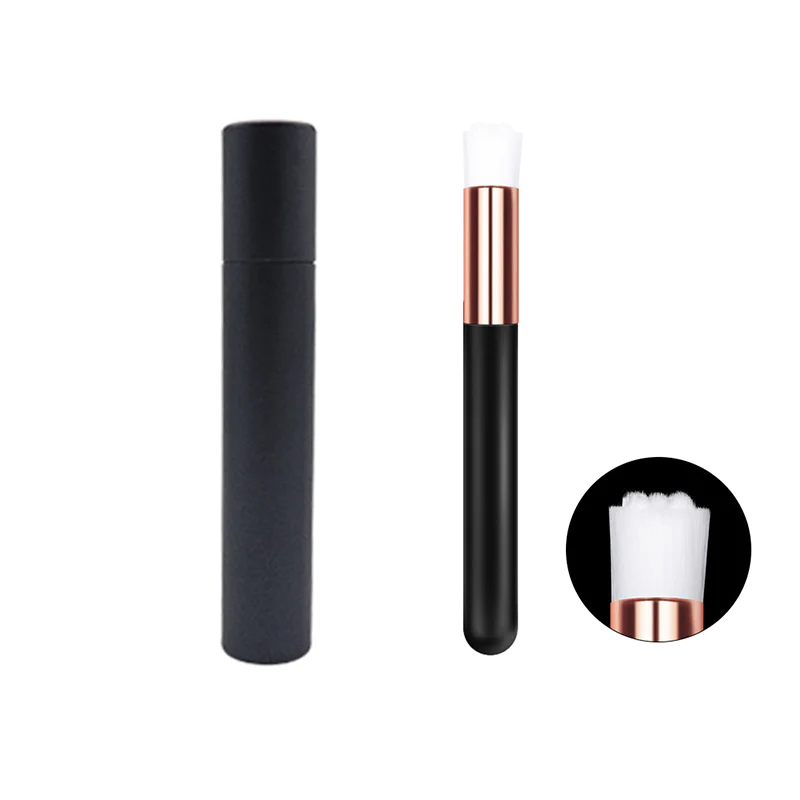
Cleansing Brush:
Usually paddle-shaped with soft, dense bristles. This is your primary cleaning tool.
Features:
- 5-10mm wide brush head
- Ultra-soft synthetic bristles
- Ergonomic handle
- Often comes in packs of 2-3
Use for: Daily cleaning, applying cleanser, working product through lashes
Spoolie Brush:
Looks like a mascara wand. Has separated, spiral bristles.
Features:
- Wand shape
- Medium-firm bristles
- Disposable or reusable
- Typically included in bulk
Use for: Combing through dry lashes, separating extensions, daily fluffing
Detail Brush:
Small, precise brush for targeted cleaning.
Features:
- Very small head (3-5mm)
- Pointed tip
- Firm enough for control
- Often angled
Use for: Corner areas, individual problem spots, precise application
Brush Quality Markers
Good brushes share these characteristics:
Bristle Quality:
- Extremely soft to touch
- Evenly trimmed
- Securely attached
- No loose bristles
Test by rubbing against your palm. You should barely feel it.
Handle Design:
- Comfortable grip
- Appropriate length (10-15cm)
- Balanced weight
- Durable material
The handle shouldn’t flex or feel flimsy. You need control for precise cleaning.
Construction:
- Bristles firmly glued
- No sharp edges
- Smooth finish
- Quality materials
Cheap brushes fall apart quickly. Bristles detach and stick in your lashes.
Cleaning Accessories
Supporting accessories make cleaning easier and more effective.
Rinse Bottle:
Small squeeze bottle for controlled rinsing.
Benefits:
- Precise water application
- Reduces mess
- Better than splashing
- Especially helpful for volume sets
How to use: Fill with lukewarm water. Gently squeeze to rinse lashes from base to tip.
Cleansing Cup:
Small container for mixing cleansers or holding water.
Benefits:
- Proper product dilution
- Organized workspace
- Prevents waste
- Often includes measurements
Essential if your kit includes concentrated cleanser.
Lint-Free Towels:
Special microfiber or paper towels that won’t shed.
Benefits:
- Won’t leave fibers on lashes
- Gentle absorption
- Hygienic (especially disposable)
- Professional quality
Regular towels leave tiny fibers that stick to wet lashes. These specialized towels prevent that problem.
Headband or Hair Ties:
Keeps hair away from lashes during cleaning.
Benefits:
- Clear workspace
- Prevents hair from getting wet
- More hygienic
- Professional appearance
I include these in salon kits. Clients appreciate the attention to detail.
Storage Solutions
Many quality kits include storage:
Clear Pouches:
See-through bags that hold all components.
Benefits:
- Keep everything together
- Protect products
- Travel-friendly
- Easy to find items
Hard Cases:
Protective containers for travel or storage.
Benefits:
- Prevent damage
- More durable
- Professional appearance
- Long-lasting
Hanging Organizers:
Bags with hooks for bathroom storage.
Benefits:
- Save counter space
- Products dry properly
- Hygienic
- Convenient
Good storage extends product life and ensures you always have clean tools ready.
Optional Add-Ons
Some premium kits include extras:
Lash Serum:
Conditioning treatment applied after cleaning.
Purpose: Strengthens natural lashes, adds shine, provides nutrients
Worth it: Yes, if you want healthier natural lashes
Makeup Remover:
Pre-cleaner for removing eye makeup before lash washing.
Purpose: Removes mascara and eyeshadow without damaging extensions
Worth it: Essential if you wear eye makeup
Mascara Wands:
Extra spoolies for daily combing.
Purpose: Keep lashes separated and fluffy between cleanings
Worth it: Yes, very affordable and useful
Cooling Eye Masks:
Soothing masks for use after cleaning.
Purpose: Reduce puffiness, refresh eyes, luxury experience
Worth it: Nice-to-have, not essential
The core components (cleanser, brush, accessories) matter most. Add-ons enhance the experience but aren’t necessary for effective cleaning.
How to Use a Lash Cleaning Kit
Having a complete kit means nothing without proper technique. Let me walk you through the correct process.
Step-by-Step Guide
Step 1: Remove Eye Makeup
If your kit includes makeup remover, start here. Apply oil-free makeup remover to a lint-free pad. Gently wipe away eyeshadow, liner, and other makeup.
Never use oil-based removers. They destroy lash adhesive. Even if your kit doesn’t include remover, you must clean makeup off before starting.
Work carefully around lashes. Don’t pull or tug. Pat gently to lift makeupaway.
Step 2: Wet Your Lashes
Use the rinse bottle from your kit if included. Otherwise, cup lukewarm water in your hands.
Close your eyes. Gently apply water to your lashes. Let water flow from the base toward the tips. Do this 3-4 times until lashes are thoroughly dampened.
Temperature matters. Hot water weakens adhesive bonds. Cold water doesn’t work well with cleanser. Lukewarm feels comfortable and works effectively.
Step 3: Prepare Your Cleanser
Follow your specific kit’s instructions. Different products require different preparation.
For foam cleansers: Pump 2-3 times directly onto your cleansing brush. The foam should lightly cover the bristles.
For liquid cleansers: Pour a small amount into the mixing cup provided. Add equal parts water. Dip your brush into the mixture.
For gel cleansers: Squeeze a rice-grain sized amount onto your brush. Work it slightly with your fingers to activate.

Don’t use too much product. Excess cleanser is difficult to rinse and leaves residue. Less is more with quality products.
Step 4: Clean Upper Lashes
This is the most important step. Take your time and be gentle.
Close your eyes. Start at the inner corner of one eye. Place your cleansing brush at the lash base where extensions meet your natural lashes.
Use downward strokes only. Move from base to tip in one smooth motion. Never scrub back and forth. Never brush upward.
Work in sections:
- Inner corner (3-4 strokes)
- Center section (4-5 strokes)
- Outer corner (3-4 strokes)
Apply very light pressure. You’re cleaning, not scrubbing. The cleanser does the work, not force.
Step 5: Clean Between Extensions
After surface cleaning, you need to clean between the lashes. This removes hidden buildup.
Angle your brush slightly. Gently work bristles through the extensions from base to tip. Imagine combing through hair, but much more gently.
Do this 2-3 times across your entire lash line. You’ll feel the brush moving between individual extensions.
This step prevents the clumping that makes extensions look messy. It’s what separates adequate cleaning from excellent cleaning.
Step 6: Clean Lower Lashes (If Extended)
Many people forget lower lashes. They need cleaning too.
Open your eyes slightly. Look up. Use your detail brush if your kit includes one. Otherwise, use the corner of your main brush.
Gentle downward strokes along lower lashes. Be extra careful here. The skin is more sensitive and there’s less room to work.
Clean both the extensions and the skin of your lower lash line. Buildup here causes irritation.
Step 7: Rinse Thoroughly
Rinsing is as important as cleaning. Leftover product attracts dirt and feels uncomfortable.
Use your rinse bottle or cupped hands. Apply lukewarm water over closed eyes. Let water flow downward over your lashes.
Keep rinsing until you feel no slippery residue. This usually takes 10-15 rinses. Don’t rush this step.
The water should run completely clear. If you see any foam or cloudiness, keep rinsing.
Step 8: Pat Dry
Take a lint-free towel from your kit. Gently pat your face and around your eyes.
Don’t rub. Just press the towel against wet areas to absorb moisture. Your extensions should remain damp, not soaking wet.
Leave lashes themselves to air dry. Don’t wipe them directly with the towel.
Step 9: Air Dry Completely
Your lashes must dry completely before doing anything else. This takes 10-15 minutes naturally.
Speed the process with a small fan on cool setting. Point it at your face from about 30cm away. The gentle airflow dries lashes without disturbing them.
Never use a hairdryer. Heat damages extensions and weakens adhesive. Always use cool air only.
Step 10: Brush and Fluff
Once completely dry, take a clean spoolie from your kit. Gently comb through lashes from base to tip.
This final step separates any lashes that dried together. It restores the fluffy, fanned appearance.
Use light, gentle strokes. Start at the base. Wiggle the brush slightly as you move toward tips. Do this 2-3 times.
Your lashes should look perfectly separated and fluffy. If you see any clumps, gently work through them again.
Tips for Best Results
Following the basic steps works well. These additional tips take your results from good to excellent.
Timing Matters:
Clean your lashes at these optimal times:
- Morning: After waking, before applying any products
- Evening: Before bed, after removing all makeup
- Post-workout: Immediately after sweating
- After crying: Salt from tears damages adhesive
I clean mine twice daily without fail. Morning and night. This consistency shows in my retention rates.
Temperature Control:
Keep everything lukewarm:
- Water temperature
- Room temperature
- Product storage temperature
Extreme temperatures affect both products and adhesive. Store your kit in a cool, dry place. Not the bathroom if it gets steamy from showers.
Pressure Guidelines:
Think “feather touch” throughout the process. You should barely feel the brush against your lashes.
If you’re pressing hard enough to feel resistance, you’re pressing too hard. The cleanser lifts dirt chemically. Physical force isn’t needed.
Product Amount:
| Cleanser Type | Correct Amount | Visual Guide |
|---|---|---|
| Foam | 2-3 pumps | Size of a grape |
| Liquid | 5-10 drops | Bottom of mixing cup covered |
| Gel | Rice grain | Barely visible on brush |
Using too much doesn’t clean better. It just makes rinsing harder and wastes product.
Advanced Techniques
Once you master basic cleaning, try these professional methods:
Double Cleanse Method:
For heavy makeup days or very oily skin, clean twice.
First cleanse: Focus on removing surface debris and makeup
Rinse thoroughly
Second cleanse: Deep clean the lash line and between extensions
Final rinse
This technique is my secret for clients with persistent retention issues. The double cleanse removes buildup that single cleaning misses.
Zone Cleaning:
Pay extra attention to problem areas.
Inner corners accumulate more oil and debris. They’re also harder to reach. Spend extra time here.
Outer corners collect makeup and mascara if you wore any before getting extensions. Clean thoroughly.
The center needs attention too. This is where most extensions sit. Thorough cleaning here affects overall appearance.
Massage Technique:
Very gently massage the cleanser into your lash line using the brush.
Tiny circular motions at the base. This loosens stubborn buildup without pulling on extensions.
Use minimal pressure. You’re stimulating, not scrubbing. This feels pleasant and increases circulation to hair follicles.
Common Mistakes to Avoid
Even with a complete kit, these mistakes sabotage results.
Mistake 1: Scrubbing Motions
I see this constantly. People think harder cleaning means better cleaning. Wrong.
Scrubbing damages extensions and loosens adhesive. It also irritates your skin and natural lashes.
Solution: Use gentle, one-direction strokes. Let the cleanser do the work.
Mistake 2: Skipping Days
Life gets busy. You’re tired. You skip cleaning “just this once.”
That one skip becomes a pattern. Buildup accumulates. Extensions start falling out.
Solution: Make cleaning non-negotiable. It takes five minutes. Your investment deserves five minutes daily.
Mistake 3: Using Tap Water Temperature
Hot water feels good on your face. But it’s terrible for lash adhesive.
Heat breaks down the chemical bonds in adhesive. Your extensions literally slide off faster.
Solution: Always use lukewarm or cool water. Test temperature on your wrist first.
Mistake 4: Insufficient Rinsing
You’re in a hurry. You rinse quickly and move on.
Cleanser residue sits on your lashes. It attracts dirt. Your lashes look dirty faster.
Solution: Rinse until water runs completely clear. Count to 15. Then rinse five more times.
Mistake 5: Touching Wet Lashes
Your lashes are wet. You immediately brush them, apply serum, or arrange them.
Wet lashes are vulnerable. The adhesive bonds are temporarily weakened. Touching them causes damage.
Solution: Hands off until completely dry. No exceptions. Air dry fully before any contact.
Mistake 6: Incorrect Product Amount
More product seems like it should clean better. It doesn’t.
Excess product is harder to rinse. It leaves residue. It wastes money.
Solution: Follow the amounts I specified earlier. Your kit’s instructions might specify amounts too.
Mistake 7: Rough Drying
You grab a regular towel and wipe your face dry. The towel catches on extensions.
This pulls out extensions. It also leaves lint fibers stuck in your lashes.
Solution: Use only the lint-free towels from your kit. Pat gently. Never wipe or rub.
Troubleshooting Common Issues
Problem: Lashes Still Feel Oily
Cause: Not enough cleanser, insufficient cleaning time, or product contains oils
Solution: Use slightly more cleanser. Spend more time on step 5 (cleaning between lashes). Check your product ingredients for hidden oils.
Problem: Lashes Look Clumpy After Cleaning
Cause: Not rinsing thoroughly enough, or not brushing through when dry
Solution: Extend your rinsing time. Make sure you complete step 10 (brushing dry lashes) thoroughly.
Problem: Eyes Feel Irritated
Cause: Cleanser getting in eyes, allergic reaction, or scrubbing too hard
Solution: Keep eyes fully closed during cleaning. Switch to a sensitive-eye formula. Reduce pressure when cleaning.
Problem: Extensions Falling Out Faster
Cause: Water too hot, scrubbing motions, or touching wet lashes
Solution: Check water temperature. Review your technique. Ensure complete drying before any contact.

Frequency Guidelines
How often you use your lash extension wash kit depends on several factors.
Daily Cleaning (Everyone):
- Every morning and night
- 5 minutes per session
- Prevents buildup
- Non-negotiable for good retention
Deep Cleaning (Weekly):
- Once per week
- 10-15 minutes
- Extra attention to lash line
- Use massage technique
Post-Activity Cleaning:
- After gym workouts
- After swimming (wait 48 hours after initial application)
- After crying
- After any sweating
Makeup Wearers:
- Clean after every makeup removal
- Double cleanse recommended
- Pay special attention to lash line
Sophie increased her cleaning from once daily to twice daily. Her retention improved from three weeks to seven weeks. The time investment was minimal. The results were dramatic.
Conclusion
Your lash cleaning kit is an investment in beautiful, long-lasting extensions. Choose a kit with quality cleanser, soft brushes, and proper accessories. Follow the correct cleaning technique daily. Avoid common mistakes that damage extensions.
Maintaining Your Lash Extensions
Clean lashes last longer and look better. Your daily five-minute routine protects a several-hundred-dollar investment. It prevents eye infections and keeps you comfortable.
Replace your cleanser when it runs out, usually every 2-3 months. Replace brushes weekly if disposable, or every 2-3 months if reusable. Keep your kit organized and accessible.
Final Thoughts on Lash Cleaning Kits
The right lash cleanser kit transforms your lash care routine. You have everything you need in one place. No more guessing about products or techniques. Just consistent, effective cleaning that keeps your extensions perfect.
I’ve seen the difference proper cleaning makes for thousands of clients. The ones who invest in quality kits and follow proper techniques always have the best retention and healthiest lashes.
My Role
My Name: Fanny
My Email: contact@universebebautylashes.com
My Website Link: www.ublash.com
Brand Name: UBLash
At UBLash, we create professional lash cleaning kits designed for perfect extension care. Our kits include pH-balanced cleansers, ultra-soft brushes, and all necessary accessories. We offer customizable packaging and low MOQ for private label partners in Europe, North America, and Australia. Whether you need personal-use kits or bulk professional supplies, we provide everything your clients need for flawless lash maintenance. Contact me for samples and discuss creating your branded lash care line.