Skip to content
I’ve removed thousands of individual false lashes over the years. I’ve seen every mistake possible. The worst? A client who tried to rip them off with duct tape. Yes, really. She lost half her natural lashes. Don’t be that person.
Removing individual false lashes safely requires proper technique and patience. Use oil-based remover to dissolve the adhesive, gently slide lashes off from outer to inner corner, and never pull or tug. The entire process takes 10-15 minutes and prevents damage to your natural lashes when done correctly.
Most people rush the removal process. They’re tired at the end of the day. They want these lashes off NOW. But rushing causes damage that takes months to repair. Spend 15 minutes removing them correctly tonight, or spend 3 months regrowing damaged lashes. Your choice.
Understanding False Lashes
Knowing what you’re working with makes removal much easier.
What are individual false lashes?
Individual false lashes are single lash extensions applied one-by-one to your natural lashes.
Individual lash construction:
Individual false lashes come in several types:
Single lashes:
- One fiber per lash
- Most natural appearance
- Applied to individual natural lashes
- Takes longest to apply
- Requires precision removal
Cluster lashes:
- Multiple fibers bundled together
- Creates fuller look
- Applied to small groups of natural lashes
- Faster application than singles
- Can be trickier to remove
Volume fans:
- 2-6 fibers fanned out
- Professional application usually
- Attached to one natural lash
- Delicate removal required
- Most popular current style

How they’re attached:
Individual lashes attach differently than strip lashes:
Attachment point:
- Bonded directly to natural lash
- Not attached to skin
- Uses specialized lash adhesive
- Creates semi-permanent hold
- Requires proper dissolving for removal
Adhesive type:
- Professional: cyanoacrylate-based
- DIY: gentler formulas
- Some are waterproof
- Others are water-resistant
- Type affects removal method needed
I remember my first time trying to remove individual lashes. I thought they’d come off like strip lashes. I pulled gently. Nothing happened. I pulled harder. Still nothing. Finally, I yanked. Three of my natural lashes came out with the extensions. I learned the hard way that individual lashes need completely different removal technique.
Difference from strip lashes:
Understanding this difference prevents removal mistakes:
| Feature | Strip Lashes | Individual Lashes |
|---|---|---|
| Application | Glued to eyelid skin | Glued to natural lashes |
| Removal time | 30 seconds | 10-15 minutes |
| Removal method | Peel from outer corner | Dissolve adhesive, slide off each lash |
| Risk of damage | Minimal if done right | Higher if rushed |
| Reusability | Yes, multiple times | No, one-time use |
| Adhesive type | Temporary, skin-safe | Semi-permanent, lash-specific |
Why removal method matters:
Strip lashes sit on your skin. You can peel them off. Individual lashes wrap around your natural lashes. Peeling doesn’t work. You need to dissolve the bond first.
Lifespan and shedding:
Individual lashes fall out naturally:
Natural shedding cycle:
- Your natural lashes shed every 60-90 days
- Individual extensions shed with them
- Completely normal process
- Losing 1-5 lashes daily is expected
- Full set needs fills every 2-3 weeks
When manual removal necessary:
- Wanting to remove all lashes at once
- Switching styles
- Experiencing irritation
- Poor application needs correction
- Special event over, returning to natural lashes
Benefits of using individual false lashes
Understanding benefits helps you protect this investment during removal.
Natural appearance:
Individual lashes look more realistic than strips:
Why they look natural:
- Mimic natural lash growth pattern
- Each lash placed strategically
- Varied lengths create dimension
- No visible band
- Move naturally with your lashes
Customization possible:
- Choose exactly where to add volume
- Control length precisely
- Create any style desired
- Adjust for eye shape
- Tailor to preferences
Long-lasting results:
With proper care, individual lashes last weeks:
Typical wear time:
- Professional application: 4-6 weeks with fills
- DIY application: 1-3 weeks typically
- High-quality adhesive: longer retention
- Proper aftercare: maximizes lifespan
- Worth protecting during removal
Investment protection:
If you’re removing to switch styles, not due to problems:
- Gentle removal preserves natural lash health
- Healthy natural lashes = better next application
- Damaged natural lashes = waiting period needed
- Proper removal = immediate reapplication possible

Comfort when applied correctly:
Good individual lashes feel comfortable:
What proper application feels like:
- Barely noticeable weight
- No pulling sensation
- No poking or irritation
- Natural blinking
- Forget you’re wearing them
If uncomfortable:
- Likely application error
- May have adhesive on skin
- Lashes might be too heavy
- Removal and reapplication needed
- Gentle removal prevents compounding damage
I wore poorly applied individual lashes once. They hurt constantly. Removal was tempting but scary. I knew rushing would make everything worse. I spent 20 careful minutes removing them properly. My natural lashes were fine. I got them reapplied correctly the next day. If I’d rushed, I would’ve been waiting weeks for my natural lashes to recover.
Versatility:
Individual lashes offer options strips can’t:
Styling flexibility:
- Wear with any makeup look
- Suitable for any occasion
- Can be dramatic or subtle
- Photograph beautifully
- More realistic than strips
Why preserve this option:
- Damaging natural lashes during removal means waiting
- Waiting means losing this versatility temporarily
- Proper removal = continuous beautiful lashes
- Worth the patience required
Cost considerations:
Individual lashes cost more than strips:
Investment breakdown:
- Professional application: $150-$400
- DIY kits: $20-$100
- Fills: $50-$150 every 2-3 weeks
- Removal products: $10-$30
- Significant investment worth protecting
Protecting your investment:
- Proper removal prevents natural lash damage
- Damaged natural lashes = can’t reapply immediately
- Waiting period = wasted money on application
- 15 minutes of careful removal protects hundreds of dollars
Preparing for Removal
Preparation makes removal safer and easier.
Gathering necessary supplies
Having everything ready prevents mid-process scrambling.
Essential removal products:
Oil-based makeup remover:
This is your most important tool:
Why oil-based works best:
- Dissolves lash adhesive effectively
- Gentler than harsh removers
- Won’t damage natural lashes
- Multi-purpose product
- Most accessible option
Good options:
- Coconut oil (my favorite)
- Olive oil
- Baby oil
- Jojoba oil
- Commercial oil-based makeup removers
- Micellar water (oil-based formula)
What to avoid:
- Water-based removers (won’t work)
- Harsh chemical removers
- Products with alcohol
- Anything causing burning sensation
- Expired products
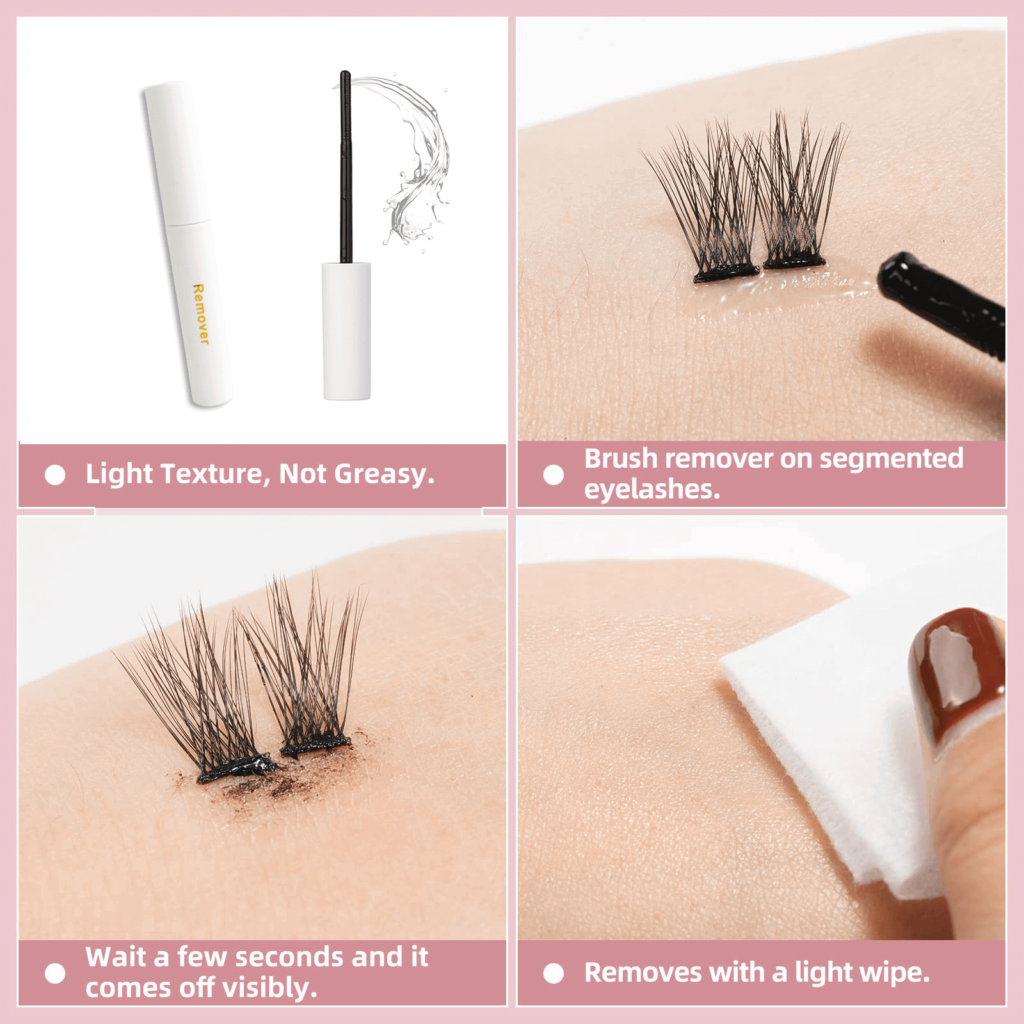
Professional lash adhesive remover:
For professional extensions:
When to use:
- Professional application with strong adhesive
- Oil alone not dissolving adhesive
- Time-sensitive removal needed
- Professional-grade necessary
Where to get:
- Beauty supply stores
- Online lash retailers
- Professional salons
- My company (UBLash) supplies these
How to use safely:
- Follow instructions exactly
- Don’t exceed recommended time
- Keep away from eyes
- Only on lashes, not skin
- Rinse thoroughly after
I stock professional adhesive remover at my salon. But honestly? For most DIY individual lashes, good coconut oil works just as well. It’s cheaper, gentler, and you probably already have it. Save the professional remover for professional extensions.
Cotton rounds or pads:
Essential for application:
Quantity needed:
- 10-15 rounds minimum
- Better to have extras
- Can’t pause mid-removal to find more
- Keep package within reach
Quality matters:
- Use lint-free if possible
- Cheap cotton sheds fibers
- Fibers stick to adhesive
- Creates frustrating mess
- Worth buying quality
Q-tips/Cotton swabs:
For precision work:
When you need them:
- Removing stubborn individual lashes
- Applying remover precisely
- Cleaning up residue
- Detail work
- Better control than pads
How many:
- 15-20 swabs
- Will use more than expected
- Cheap, so have plenty
- Can’t reuse them
Tweezers (optional but helpful):
For stubborn lashes:
Type to use:
- Pointed tip tweezers
- Clean and sanitized
- Good quality (no rough edges)
- Used for lashes only
- Not your eyebrow tweezers
When to use:
- Grasping loosened lashes
- Removing last stubborn pieces
- Detail work
- Final cleanup
- Not for pulling!
Important: Tweezers are for gently grasping already-loosened lashes, never for pulling attached lashes. If you’re tempted to pull, the adhesive isn’t dissolved enough yet.
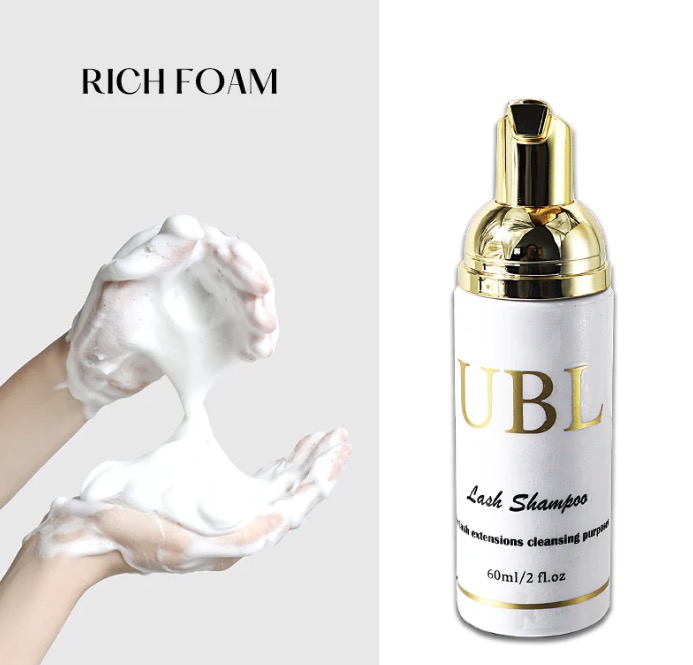
Cleansing supplies:
For after removal:
Gentle cleanser:
- Lash-safe formula
- pH balanced
- No harsh chemicals
- Removes residue
- Prepares for next step
Clean towels:
- Soft, lint-free
- Dedicated lash towels
- Multiple available
- Fresh and clean
- Pat dry only, no rubbing
Additional helpful items:
Good lighting:
- Bright, direct light
- Can see what you’re doing
- Prevents missing lashes
- Reduces eye strain
- Essential for safety
Mirror:
- Large, stable mirror
- Magnifying side helpful
- Good positioning
- Both hands free
- Can see clearly
Timer:
- Track soaking time
- Don’t rush process
- Ensure adequate time
- Consistent results
- Prevents impatience
My complete setup:
When I remove my individual lashes at home:
- Large bottle coconut oil
- 20 cotton rounds
- 30 Q-tips
- Clean pointed tweezers
- Gentle foaming cleanser
- 3 clean soft towels
- Magnifying mirror
- Phone timer
- Comfortable chair
- Good overhead lighting
Total cost for all supplies (except mirror and chair): about $25. Lasts for multiple removals. Small investment for safe removal.
Importance of clean lashes
Starting with clean lashes makes removal much easier.
Remove all makeup first:
Makeup interferes with removal:
Why this matters:
- Makeup blocks remover from reaching adhesive
- Creates barrier between oil and glue
- Makes process take longer
- Reduces effectiveness
- Can cause irritation
What to remove:
- All eye makeup
- Mascara (if used on extensions)
- Eyeliner
- Eyeshadow
- Face makeup near eyes
How to remove makeup:
Step 1: Use makeup remover
- Apply to cotton round
- Gently wipe over closed eyes
- Remove all visible makeup
- Don’t scrub or rub hard
- Multiple passes if needed
Step 2: Cleanse eyelids
- Use gentle cleanser
- Work into lashes carefully
- Rinse thoroughly
- Pat dry gently
- Ensure completely clean
Check for residue:
After cleaning:
What to look for:
- No color on cotton round when wiping
- Lashes feel clean, not sticky
- No visible makeup
- No heavy product feeling
- Fresh, clean sensation
Common missed spots:
- Lash line
- Inner corners
- Waterline
- Under eyes
- Base of lashes
I always double-cleanse before removal. First cleanse removes obvious makeup. Second cleanse catches what I missed. The five extra minutes makes removal so much easier. Oil-based remover works twice as fast on clean lashes.

Brush through lashes:
Detangle before starting:
Why brush first:
- Identifies stuck lashes
- Removes dried mascara clumps
- Prevents tangles during removal
- Makes individual lashes visible
- Easier to assess what you’re working with
How to brush:
- Use clean spoolie brush
- Start at base, brush outward
- Gentle, light strokes
- Don’t tug or pull
- Work through any tangles slowly
Dry lashes completely:
Moisture interferes with oil absorption:
Why dry lashes matter:
- Oil and water don’t mix
- Wet lashes prevent oil penetration
- Adhesive won’t dissolve properly
- Process takes much longer
- Results less effective
Drying method:
- Pat gently with clean towel
- Let air dry few minutes
- Don’t rub vigorously
- Ensure completely dry
- Check by touch
Assess lash condition:
Before starting removal, evaluate:
Check for:
- How many lashes remaining
- Where they’re located
- How secure they feel
- Any damaged areas
- Problem spots needing extra care
This assessment helps:
- Estimate removal time needed
- Identify challenging areas
- Plan approach
- Set realistic expectations
- Prevents surprises mid-process
Create comfortable environment:
Physical comfort matters:
Setup considerations:
- Comfortable seating
- Good back support
- Mirror at eye level
- All supplies within reach
- Good lighting
- No time pressure
- Privacy
Why comfort matters:
- Removal takes 10-15 minutes minimum
- Uncomfortable position causes rushing
- Rushing causes damage
- Comfort allows patience
- Patience ensures success
Mental preparation:
Set proper expectations:
Mindset needed:
- This takes time
- Rushing causes damage
- Patience is essential
- Each lash removed individually
- No shortcuts exist
- Results worth the time
Time allocation:
- Block out 20-30 minutes
- More time better than less
- Don’t start if rushing somewhere
- Relaxed mindset essential
- Can’t pause mid-process safely
I learned this the hard way. I once started removal 20 minutes before needing to leave for an event. Big mistake. I rushed. I pulled lashes that weren’t ready. I damaged several natural lashes. I showed up to the event with puffy, irritated eyes and patchy lashes. Now I never start removal unless I have at least 30 minutes of uninterrupted time.
Step-by-Step Process for Safe Removal
Follow these steps exactly for damage-free removal.
Step 1: Soften the adhesive
Dissolved adhesive is the key to safe removal.
Apply oil-based remover:
This is the most important step:
Application method:
For coconut oil:
- Warm small amount between fingers
- Oil should be liquid, not solid
- Gentle warmth helps penetration
- Don’t use hot oil
- Comfortable temperature essential
For liquid removers:
- Saturate cotton round completely
- Excess better than too little
- Round should be dripping slightly
- Not just damp
- Generous application necessary
Placement technique:
Close your eyes:
- Keep closed throughout process
- Prevents product in eyes
- More comfortable
- Better coverage
- Safer application
Apply to lash line:
- Press saturated cotton round against closed eyelid
- Position over lash line exactly
- Cover all lashes
- From inner to outer corner
- Ensure complete coverage
Hold in place:
- Maintain gentle pressure
- Don’t press hard
- Just enough to keep contact
- Hold steady
- No rubbing or wiping yet
Soaking time required:
This is where patience matters most:
Minimum time:
- 3-5 minutes minimum
- Longer for waterproof adhesive
- Longer for professional application
- Can’t rush this step
- Essential for safe removal
What’s happening during soak:
- Oil penetrating adhesive bond
- Adhesive breaking down
- Bond weakening
- Lashes loosening
- Chemical process takes time
Signs adhesive is ready:
- Lashes feel
loose when gently touched
- Can move lashes slightly
- No strong resistance
- Wiggles slightly
- Ready to slide off
If not ready after 5 minutes:
- Reapply fresh oil-soaked cotton
- Wait another 3-5 minutes
- Don’t proceed if lashes still stuck
- Patience prevents damage
- Can’t over-soak
My timing approach:
I set a timer for 5 minutes. I don’t check or peek. I just wait. When the timer goes off, I gently touch one lash. If it doesn’t move easily, I reset the timer for 3 more minutes. I’ve learned that the extra wait time prevents damage. Rushing this step ruins everything.
Reapplication technique:
Most people need to reapply:
When to reapply:
- After initial 5-minute soak
- When removing stubborn lashes
- If lashes still feel stuck
- Between removing different sections
- Whenever resistance felt
How to reapply:
- Remove old cotton round
- Get fresh round with oil
- Apply to remaining lashes
- Wait another 3-5 minutes
- Repeat as needed

Common mistakes during soaking:
Mistake 1: Not enough product
- Using barely damp cotton
- Trying to save product
- Adhesive doesn’t fully dissolve
- Makes removal harder
- Increases damage risk
Mistake 2: Not waiting long enough
- Impatience taking over
- Checking every 30 seconds
- Not giving process time to work
- Leading cause of damage
- Costs more time overall
Mistake 3: Wiping or rubbing
- Moving cotton around
- Rubbing to “help it work faster”
- Disrupts penetration process
- Irritates skin
- Doesn’t speed up process
Mistake 4: Using water-based products
- Thinking any remover works
- Water doesn’t dissolve lash adhesive
- Won’t work no matter how long you wait
- Frustrating waste of time
- Must use oil-based
Special considerations for different adhesive types:
DIY lash adhesive:
- Usually easier to remove
- 3-5 minutes often sufficient
- Regular coconut oil works well
- Less resistant
- More forgiving
Professional lash adhesive:
- Much stronger bond
- May need professional remover
- 5-10 minutes minimum
- Sometimes needs multiple applications
- More patience required
Waterproof formulas:
- Most resistant type
- Requires oil-based remover specifically
- Longest soaking time
- 10+ minutes not unusual
- Consider professional removal
Sensitive adhesive (for sensitive eyes):
- Weaker bond intentionally
- Easier removal usually
- 3-5 minutes typically enough
- Gentler process
- Less product needed
Testing readiness:
Before proceeding to removal:
Gentle touch test:
- Very lightly touch one lash
- Does it move slightly?
- Any wiggle at all?
- Should feel loosened
- No strong resistance
If lash doesn’t move:
- Not ready yet
- Reapply oil
- Wait longer
- Don’t force it
- Patience essential
If lash moves slightly:
- Almost ready
- Wait 2 more minutes
- Then test again
- Better safe than sorry
- Close to perfect timing
If lash moves easily:
- Ready for removal
- Proceed to next step
- Work quickly before oil dries
- Systematic approach
- Success likely

Step 2: Use the right tools
Proper tools make removal safer and easier.
Cotton rounds for initial removal:
Your primary removal tool:
How to use cotton rounds:
Preparation:
- Have 10+ rounds ready
- Stack within reach
- Won’t want to stop mid-process
- Keep oil bottle nearby
- Organize workspace
Application technique:
- Saturate fresh cotton round with oil
- Gently press against lashes
- Hold for 30 seconds
- Wipe slowly from base to tip
- Use gentle, sweeping motion
Direction matters:
- Always base to tip direction
- Never tip to base
- Follows natural lash growth
- Reduces breakage risk
- More effective removal
Pressure control:
- Very gentle pressure only
- Let oil do the work
- No scrubbing motion
- No vigorous wiping
- Soft, controlled movements
What you’ll see on cotton:
- Dissolved adhesive
- Removed lashes
- Black residue (if wore mascara)
- Clear/white adhesive pieces
- More product than expected
When to get fresh cotton:
- After every few lashes
- When cotton looks saturated with product
- Can’t see clean area anymore
- Before switching eyes
- Keep process clean
Q-tips for precision work:
For detailed removal:
When to use Q-tips:
Stubborn individual lashes:
- Lashes not coming off with cotton rounds
- Need more targeted application
- Precise oil placement needed
- One lash at a time removal
- Detail work essential
Adhesive residue:
- Small bits stuck to natural lashes
- Cleanup after main removal
- Tiny pieces remaining
- Final polishing
- Perfecting results
Inner corner lashes:
- Hard to reach with cotton rounds
- Small, delicate area
- Precision required
- Less mess
- Better control
Application technique:
Step 1: Saturate Q-tip
- Dip in oil thoroughly
- Should be dripping slightly
- Not just damp
- Generous application
- Can’t use too much
Step 2: Target specific lash
- Hold Q-tip at angle
- Apply directly to lash base
- Where adhesive is strongest
- Hold 30-60 seconds
- Let oil penetrate
Step 3: Gentle slide motion
- Slowly slide Q-tip along lash
- Base to tip direction only
- Lash should slide off with motion
- No pulling or tugging
- Let adhesive dissolution do the work
Step 4: Check for residue
- Look at natural lash
- Any adhesive remaining?
- Feel for bumps or roughness
- Clean until smooth
- Thorough checking important
Advantages of Q-tips:
- More precision than cotton rounds
- Less product waste
- Better for stubborn lashes
- Can target exactly
- Easier control
Disadvantages:
- Takes more time
- Can’t do bulk removal
- Need many Q-tips
- More tedious
- Hand fatigue possible
I use cotton rounds for the first 80% of removal. Then I switch to Q-tips for the remaining stubborn lashes and cleanup. This combination gives best results. All cotton rounds would miss details. All Q-tips would take forever.
Tweezers for grasping (not pulling):
Use carefully and correctly:
Important distinction:
Correct use:
- Grasp already-loosened lashes
- Hold lash while sliding off
- Remove lash that’s falling off anyway
- Support during removal
- Gentle holding only
Incorrect use (causes damage):
- Pulling attached lashes
- Tugging at stuck lashes
- Forcing removal
- Yanking anything
- Using as primary removal tool
When tweezers are helpful:
Scenario 1: Nearly-off lash
- Lash loose but not falling off
- Adhesive dissolved but lash stuck in weird position
- Easy to grasp and slide off
- Prevents need to re-soak
- Quick final removal
Scenario 2: Cleanup
- Tiny lash pieces remaining
- Too small for cotton or Q-tip
- Need precise grasping
- Final perfecting touches
- Detail work
Scenario 3: Preventing fallout into eye
- Lash loosened and falling
- About to fall into eye
- Catch it with tweezers
- Remove safely
- Prevent irritation
Proper tweezers technique:
Grip:
- Hold tweezers like pencil
- Light, controlled grip
- Not tight or tense
- Relaxed hand
- Steady control
Approach:
- Come from side, not straight on
- See what you’re doing
- Position carefully
- No sudden movements
- Deliberate placement
Grasping:
- Grasp lash at base, near natural lash
- Gentle pressure only
- Just enough to hold
- Don’t squeeze hard
- Light touch essential
Removal:
- Slide lash off in same motion as natural lash growth
- Smooth, controlled movement
- No jerking or yanking
- Consistent speed
- Let adhesive dissolution do the work
If resistance felt:
- Stop immediately
- Don’t pull harder
- Lash not ready for removal
- Apply more oil
- Wait longer
Tweezers mistakes to avoid:
Mistake 1: Using as primary tool
- Trying to pull off every lash with tweezers
- Bypassing oil soaking step
- Guaranteed damage
- Painful process
- Natural lashes will come out
Mistake 2: Pulling stuck lashes
- Feeling resistance and pulling anyway
- “Just a little tug won’t hurt”
- Causes most damage
- Can rip out natural lashes
- Never worth it
Mistake 3: Wrong angle
- Pulling straight out from eyelid
- Creates shearing force
- Maximum stress on natural lash
- Easy way to damage
- Wrong mechanics
Mistake 4: Using dirty tweezers
- Old adhesive on tweezers
- Bacteria buildup
- Infection risk
- Sticks to lashes
- Unsanitary
My tweezers rule:
If I feel any resistance when gently grasping a lash with tweezers, I immediately let go and apply more oil. No exceptions. The temptation to “just pull a little” is strong. But that “little pull” causes the damage you’re trying to avoid. Trust the process.
Spoolie brush:
For final cleanup and checking:
When to use:
- After all lashes removed
- Before cleansing
- To separate natural lashes
- Check for remaining adhesive
- Final inspection
How to use:
- Brush through natural lashes gently
- Base to tip direction
- Feel for any rough spots
- Visual inspection
- Ensure complete removal
What you’re checking for:
- All extensions gone
- No adhesive bumps
- Natural lashes separated
- Clean lash line
- Ready for cleansing
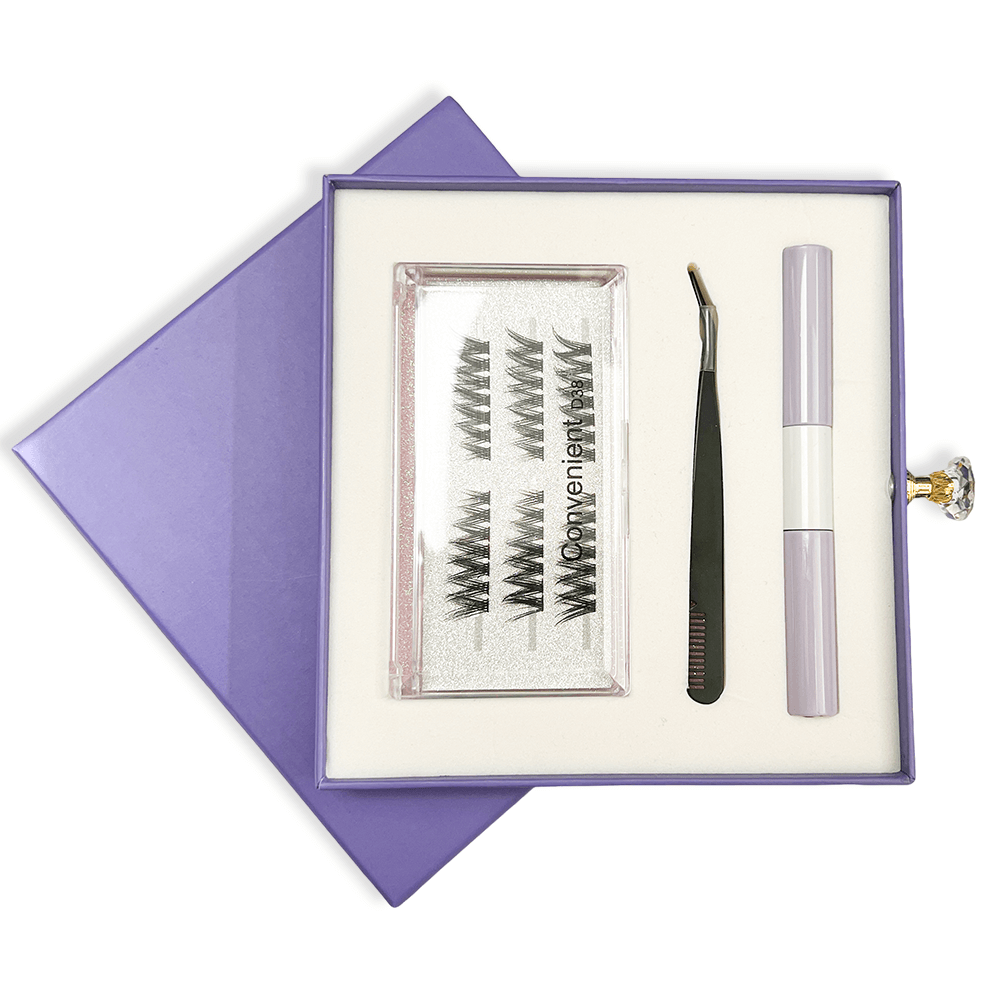
Step 3: Gently remove each lash
Systematic removal prevents damage.
Work in sections:
Organization makes process manageable:
How to divide sections:
Outer corner section:
- Outermost 5-8 lashes
- Usually easiest to remove
- Start here for confidence
- Good practice area
- Build skill before harder sections
Middle section:
- Center portion of lash line
- Usually where most lashes applied
- Take your time here
- Most time-consuming section
- Largest number of lashes
Inner corner section:
- Innermost 3-5 lashes
- Often trickiest to reach
- Need good lighting
- Precision required
- Save for last
Section-by-section approach:
Benefits:
- Less overwhelming
- Track progress
- Systematic process
- Can take breaks between sections
- Organized removal
Process for each section:
- Apply oil-soaked cotton to section
- Hold 3-5 minutes
- Remove lashes in that section
- Move to next section
- Repeat until all sections complete
One eye at a time:
Never start both eyes simultaneously:
Why one eye at a time:
- Need to see what you’re doing
- One eye open for vision
- Can monitor progress
- Less confusing
- Easier to track
Which eye first:
- Dominant hand’s opposite eye first
- If right-handed: left eye first
- Better angle and control
- More comfortable
- Save harder side for when experienced
Between eyes:
- Take short break
- Rest hand
- Check supplies
- Mentally prepare
- Don’t rush into second eye
Proper removal technique for each lash:
This is the critical moment:
Starting position:
- Lash should already be loosened from oil
- No resistance when touched
- Wiggles slightly
- Ready to slide off
- Never start if still stuck
Grasping the lash:
If using cotton round:
- Press round against lash
- Gentle pressure at base
- Hold for few seconds
- Begin sliding motion
- Let lash come off onto cotton
If using Q-tip:
- Apply Q-tip to lash base
- Hold 30 seconds
- Begin gentle sliding motion
- Base to tip direction
- Lash slides off easily
If using tweezers:
- Grasp loosened lash gently
- Hold near base
- Light pressure only
- Confirm no resistance
- Proceed only if moves freely
The sliding motion:
Most important technique:
How to slide:
- Start at lash base
- Move slowly toward tip
- Follow natural lash curve
- Maintain consistent pressure
- Smooth, controlled motion
Speed:
- Slow and steady
- Not fast
- Not super slow
- About 2-3 seconds per lash
- Let adhesive time to release
Pressure:
- Very light
- Just enough to maintain contact
- Don’t press hard
- Don’t squeeze
- Gentle throughout
Direction:
- Always base to tip
- Never reverse
- Never sideways
- Never straight out from eyelid
- Follow natural growth pattern
What you should feel:
- Lash sliding smoothly
- Little to no resistance
- Extension separating from natural lash
- Easy, comfortable process
- No pulling sensation
What you should NOT feel:
- Tugging
- Pain
- Strong resistance
- Natural lash pulling
- Uncomfortable sensation
If you feel resistance:
Stop immediately:
What resistance means:
- Adhesive not fully dissolved
- Needs more oil
- Needs more time
- Not ready for removal
- Proceeding will cause damage
What to do:
- Stop removal attempt
- Apply fresh oil-soaked cotton
- Hold 3-5 more minutes
- Test again
- Only proceed when no resistance
Never power through resistance:
- Won’t work
- Will damage natural lashes
- Causes pain
- Creates problems
- Defeats purpose of careful removal
I can’t stress this enough: if you feel any resistance, stop. I’ve removed thousands of lashes. I still encounter stubborn ones. I still stop and reapply oil. I still wait. There’s no shortcut. Every time someone tries to power through resistance, they damage their natural lashes. Every. Single. Time.
Checking each lash after removal:
After each lash comes off:
Look at natural lash:
- Still intact?
- Any adhesive remaining?
- Looks healthy?
- No breakage?
- Normal appearance?
Look at removed extension:
- Clean base?
- No natural lash attached to it?
- Came off intact?
- No resistance felt during removal?
- Smooth process?
If natural lash came out too:
Sometimes happens:
Don’t panic:
- Losing 1-5 lashes normal during removal
- Your lashes naturally shed daily
- These were probably ready to shed anyway
- Not necessarily mistake
- Common occurrence
When it’s a problem:
- If losing many lashes
- If see lash broken off mid-shaft
- If removal was forced
- If felt pain
- Then you’re damaging lashes
Adjusting technique:
- Use more oil
- Wait longer
- Be gentler
- Slow down
- More patience
Dealing with stubborn lashes:
Some lashes won’t cooperate:
Why some lashes are stubborn:
Too much adhesive applied:
- Extra adhesive takes longer to dissolve
- Needs more oil applications
- Needs longer soak time
- Just needs patience
- Will eventually release
Adhesive in wrong location:
- If adhesive touched skin
- Skin adhesion stronger
- Harder to dissolve
- May need professional removal
- Don’t force it
Waterproof formula:
- Some adhesives more resistant
- May need specialized remover
- Regular oil might not work
- Consider professional removal
- Don’t damage lashes trying
Lash wrapped multiple times:
- Extension wrapped around natural lash
- More contact points
- More adhesive surface area
- Needs extra time and care
- Patience essential
Approach for stubborn lashes:
Step 1: Extra oil application
- Saturate Q-tip heavily
- Apply directly to stubborn lash
- Hold Q-tip against it for 2-3 minutes
- Really let oil penetrate
- Don’t skip this step
Step 2: Gentle manipulation
- Very gently try to rotate lash
- Not pulling, just rotating slightly
- Helps oil penetrate from all angles
- Can break up adhesive
- Be very gentle
Step 3: Wait longer
- If still stuck, wait
- Apply more oil
- Set timer for 5 more minutes
- Walk away
- Come back and try again
Step 4: Accept limitations
- Some lashes may need professional removal
- Better to leave one stubborn lash than damage ten natural ones
- Can visit salon next day
- Not worth forcing
- Protect natural lash health
My stubborn lash story:
I once had one individual lash that wouldn’t budge. I tried everything. More oil. Longer waits. Different angles. Nothing worked. After 30 minutes, I gave up on that one lash. I left it. The next day, I tried again with fresh oil. It came off in 2 minutes. Sometimes lashes just need time. Patience always wins.
Pace yourself:
Marathon, not sprint:
Take breaks:
- Every 5-10 lashes
- Rest your hand
- Close your eyes
- Relax shoulders
- Prevents fatigue
Why breaks matter:
- Tired hands make mistakes
- Frustration leads to rushing
- Fresh perspective helps
- Physical comfort important
- Mental reset valuable
Don’t rush:
- No time limit
- Better slow and safe
- Quality over speed
- Each lash deserves attention
- Results worth the time
Signs you need a break:
- Hand cramping
- Eye strain
- Feeling frustrated
- Losing patience
- Making careless movements
Break activities:
- Stand up and stretch
- Roll shoulders
- Rest eyes
- Drink water
- Deep breaths
Tracking progress:
Staying motivated:
Visual progress:
- Can see fewer lashes remaining
- Sections becoming clear
- End in sight
- Encouraging
- Motivating
Mental tracking:
- “Only 10 more lashes”
- “One section left”
- “Almost done”
- Positive self-talk
- Maintain patience
Celebrating milestones:
- Finished one eye
- Completed one section
- Removed stubborn lash
- Small victories
- Keep momentum
Step 4: Clean your eyelids afterwards
Post-removal cleaning is essential.
Remove all residue:
Leftover adhesive causes problems:
Why cleaning matters:
Residual adhesive issues:
- Feels sticky and uncomfortable
- Attracts dirt and bacteria
- Can cause irritation
- Interferes with new application
- Looks messy
Oil residue problems:
- Heavy, greasy feeling
- Clogs hair follicles
- Can cause styes
- Uncomfortable
- Needs removal
Health concerns:
- Bacteria growth in residue
- Infection risk
- Irritation potential
- Eye health priority
- Prevention important
First cleaning step:
Remove excess oil:
Gentle wiping:
- Use clean, dry cotton round
- Gently wipe eyelid
- Remove visible oil
- Don’t scrub
- Light pressure only
Check lash line:
- Look closely at lash line
- Any adhesive bits remaining?
- Small white or clear pieces?
- Bumpy texture?
- Must remove completely
Use Q-tip for details:
- Dip Q-tip in clean oil
- Go over each lash individually
- Remove any tiny adhesive pieces
- Between lashes carefully
- Thorough checking
Double cleanse method:
Most effective approach:
First cleanse – Oil-based:
Why start with oil:
- Removes remaining adhesive
- Dissolves oil-based residue
- Prepares for water-based cleanse
- Thorough first step
- Essential foundation
How to do it:
- Apply oil-based cleanser to dry eyelid
- Massage gently for 30-60 seconds
- Focus on lash line especially
- Use circular motions
- Be thorough but gentle
Products that work:
- Cleansing oil
- Oil-based makeup remover
- Same coconut oil used for removal
- Micellar water (oil-based)
- Gentle cleansing balm
Application technique:
- Apply to dry skin
- Don’t add water yet
- Let it work for a minute
- Massage thoroughly
- Cover entire eye area
Second cleanse – Water-based:
Why second cleanse needed:
- Removes oil from first cleanse
- Water-based clean feeling
- Removes any missed residue
- Fresh, clean result
- Completes process
How to do it:
- Wet eyelid with lukewarm water
- Apply gentle, lash-safe cleanser
- Create light lather
- Massage for 30 seconds
- Rinse thoroughly
Products that work:
- Lash extension safe cleanser
- Gentle foaming cleanser
- Baby shampoo (diluted)
- pH-balanced face wash
- Oil-free formula
Rinsing technique:
Proper rinsing crucial:
Water temperature:
- Lukewarm water only
- Not hot
- Not cold
- Comfortable temperature
- Gentle on eyes
Rinsing method:
- Cup water in hands
- Splash over closed eyes
- Multiple rinses
- Ensure all cleanser removed
- No residue left
How to know you’re done:
- No slippery feeling
- No cleanser smell
- Skin feels clean, not tight
- Comfortable feeling
- Lashes squeak when rubbed
Checking for missed spots:
Thorough inspection:
Visual check:
- Look in magnifying mirror
- Bright lighting
- Any visible residue?
- White or clear bits?
- Clean lash line?
Touch check:
- Gently feel lash line
- Smooth texture?
- No bumps?
- No sticky feeling?
- Clean sensation?
Individual lash check:
- Use clean spoolie
- Brush through each lash
- Catches on anything?
- Feels smooth?
- Natural lashes free-moving?
Common missed spots:
Inner corner:
- Easy to miss
- Hard to see
- Use Q-tip specifically
- Check carefully
- Common problem area
Lash base:
- Where most adhesive accumulates
- Needs extra attention
- Use angled Q-tip
- Get right at base
- Thorough cleaning essential
Between lashes:
- Small adhesive bits hide here
- Need precision cleaning
- Q-tip works best
- Check each space
- Detail work matters
Under lashes:
- Bottom of lash line
- Often forgotten
- Can trap residue
- Check and clean
- Complete the process
If residue remains:
Don’t skip this:
Re-cleaning process:
- Apply more oil to problem area
- Hold Q-tip on spot for 30 seconds
- Gently work adhesive loose
- Wipe away with clean cotton
- Cleanse again
Stubborn adhesive:
- May need multiple attempts
- More oil, more time
- Patience still applies
- Will eventually release
- Don’t scrape or pick
When to seek help:
- If can’t remove all residue after trying
- If eye becomes irritated
- If unsure what you’re seeing
- Professional removal available
- Better safe than sorry
I always do three passes with Q-tips after I think I’m done. First pass finds residue I missed. Second pass catches what first pass missed. Third pass usually comes up clean. Those extra few minutes ensure completely clean lashes.
Drying your lashes:
Final step of cleaning:
Pat dry method:
- Use clean, soft towel
- Gentle patting motion
- No rubbing
- No pulling
- Light pressure only
Air dry option:
- Let lashes air dry naturally
- Takes few minutes
- Safest method
- No mechanical stress
- Can’t go wrong
What to avoid:
- Rubbing vigorously
- Using rough towel
- Hair dryer heat
- Tugging while drying
- Harsh treatment
Checking final result:
Before moving to aftercare:
Look in mirror:
- Natural lashes only remaining
- No extensions visible
- Clean lash line
- No redness or irritation
- Healthy appearance
Feel your lashes:
- Soft and clean
- Natural texture
- No stickiness
- Comfortable
- Normal sensation
Ready for next step:
- Completely clean
- Completely dry
- No residue
- Ready for aftercare
- Process complete
Aftercare Tips
Proper aftercare maintains natural lash health.
How to care for your natural lashes
Post-removal care is crucial.
Immediate aftercare (first 24 hours):
First day is important:
Avoid eye makeup:
Why wait:
- Lash follicles need recovery time
- Makeup can irritate
- Residue might remain that reacts with makeup
- Eyes may be slightly sensitive
- Give everything time to settle
What to skip:
- Mascara especially
- Eyeliner
- Eyeshadow
- Any eye makeup
- Wait full 24 hours
If you must wear makeup:
- Only if absolutely necessary
- Use gentle, natural products
- Remove very gently
- Don’t rub eyes
- Still not recommended
No rubbing or touching:
Why this matters:
- Lash follicles slightly stressed from removal process
- Touching can transfer bacteria
- Rubbing can damage weakened lashes
- Irritation more likely
- Let everything calm down
Breaking the habit:
- Be conscious of touching
- Keep hands away from face
- Distract yourself when tempted
- Remind yourself frequently
- Worth the discipline
Moisturize the area:
Why moisturizing helps:
- Removal process can dry skin
- Cleaners can be drying
- Moisturized skin healthier
- Supports lash follicle health
- Promotes healing
What to use:
- Lash serum
- Eye cream
- Natural oils (if tolerated)
- Gentle, fragrance-free products
- Ophthalmologist-tested preferred
Application method:
- Very gentle application
- Fingertip dabbing
- Don’t rub in vigorously
- Avoid getting in eyes
- Light layer sufficient
Watch for irritation:
Normal reactions:
- Slight sensitivity
- Light redness (fades in hours)
- Tired eye feeling
- All temporary
- Should improve quickly
Concerning signs:
- Persistent redness
- Swelling
- Pain
- Discharge
- Worsening symptoms
If irritation occurs:
- Stop all products immediately
- Cold compress can help
- Don’t rub
- If severe or persists, see doctor
- Better safe than sorry
Longer-term care (first week):
Week one recovery:
Gentle mascara only:
When to resume:
- After 24-48 hours
- When eyes feel normal
- No sensitivity remaining
- Clean slate
- Ready to proceed
What type to use:
- Gentle, natural formula
- Conditioning mascara
- Tubing mascara ideal
- Easy-to-remove formulas
- Avoid waterproof
Why avoid waterproof:
- Requires harsh removal
- Stresses lashes further
- Defeats recovery purpose
- Can damage weakened lashes
- Not worth it during recovery
Application tips:
- Light coat only
- Don’t pump wand (introduces air and bacteria)
- Apply gently
- Let it dry completely
- One coat sufficient
Lash serum application:
Benefits of lash serum:
- Promotes lash health
- Supports growth
- Strengthens lashes
- Conditions follicles
- Prevents damage
When to start:
- Immediately after removal
- Every night before bed
- Consistent application important
- Long-term commitment
- Results take time
How to apply:
- Clean lashes first
- Apply thin line to lash line
- Both upper and lower
- Let it dry before sleeping
- Don’t get in eyes
Recommended ingredients:
- Peptides
- Biotin
- Panthenol
- Hyaluronic acid
- Natural oils
Products I recommend:
At my salon, I sell lash serums. But honestly, these drugstore options work well too:
- RapidLash
- GrandeLASH-MD
- RevitaLash
- Latisse (prescription, most effective)
- Even castor oil works
Brush lashes daily:
Why brushing helps:
- Prevents tangling
- Distributes natural oils
- Stimulates follicles
- Keeps lashes healthy
- Takes 30 seconds
When to brush:
- Morning after cleansing
- Night before serum
- Anytime lashes feel tangled
- Daily minimum
- More if needed
How to brush:
- Use clean spoolie brush
- Start at base
- Brush outward gently
- Light pressure
- Careful, gentle strokes
Avoid heavy eye products:
What to skip:
Heavy eye creams:
- Can weigh down lashes
- Interfere with growth
- Cause buildup
- Block follicles
- Use light formulas instead
Oil-based products near lash line:
- Can be too heavy
- Cause irritation in some people
- Attract dirt
- Use sparingly if at all
- Light application only
Thick eyeliners:
- Can pull on lashes when removing
- Require rubbing to remove
- Stress on recovering lashes
- Skip or use minimal amounts
- Prefer liquid to pencil
Maintain clean lashes:
Daily cleansing:
- Gentle cleanser morning and night
- Remove all makeup before bed
- Keep lash line clean
- Prevents buildup
- Supports lash health
Why daily cleaning matters:
- Removes dirt and oil
- Prevents follicle clogging
- Reduces infection risk
- Creates healthy environment
- Simple but effective
Proper cleansing technique:
- Use lash-safe cleanser
- Gentle circular motions
- Rinse thoroughly
- Pat dry
- No harsh rubbing
Nutrition for lash health:
Internal health affects lashes:
Key nutrients:
Biotin:
- Supports hair growth
- Strengthens hair structure
- Found in eggs, nuts, sweet potatoes
- Supplement option available
- Consult doctor first
Protein:
- Hair is made of protein
- Adequate protein essential
- Lean meats, fish, legumes
- Complete protein important
- Foundation of lash health
Vitamin E:
- Antioxidant protection
- Supports follicle health
- Nuts, seeds, leafy greens
- Improves circulation
- Promotes growth
Omega-3 fatty acids:
- Anti-inflammatory
- Supports cell growth
- Fish, flaxseed, walnuts
- Keeps lashes flexible
- Prevents brittleness
Iron:
- Prevents lash shedding
- Supports healthy growth cycle
- Red meat, spinach, lentils
- Especially important for women
- Deficiency causes lash loss
Hydration:
- Drink adequate water
- Hydrated cells function better
- Affects overall hair health
- Simple but often forgotten
- Aim for 8 glasses daily
Supplements to consider:
After discussing with your doctor:
- Biotin (5000-10000 mcg daily)
- Multivitamin with iron
- Omega-3 supplement
- Vitamin E
- Collagen peptides
Protecting lashes during sleep:
Nighttime care matters:
Sleep position:
- Avoid sleeping face-down
- Smashes lashes
- Causes breakage
- Side or back sleeping better
- Use silk pillowcase
Why silk pillowcase:
- Less friction
- Prevents snagging
- Gentler on lashes and skin
- Retains moisture better
- Worth the investment
Before-bed routine:
- Remove all makeup
- Apply lash serum
- Let serum dry
- Don’t rub eyes
- Gentle care
Managing lash growth cycle:
Understanding natural cycle:
Normal lash cycle:
- Growth phase (Anagen): 30-45 days
- Transition phase (Catagen): 2-3 weeks
- Resting phase (Telogen): ~100 days
- Then sheds and restarts
- Completely natural
What this means:
- You’ll always have lashes in different phases
- Some shedding always normal
- 1-5 lashes per day typical
- Don’t panic over natural shedding
- Cycle continues regardless
Supporting healthy cycle:
- Consistent care routine
- Proper nutrition
- Gentle treatment
- Lash serum use
- Patience
When to be concerned:
- Excessive shedding (more than 5-10 daily)
- Bald patches
- Thinning lashes
- Broken lashes
- See doctor if concerned
I see clients panic about normal lash shedding all the time. They think they damaged their lashes during removal. But when we count, it’s only 3-4 lashes. That’s completely normal daily shedding. Natural lash cycles mean you lose lashes every day. The removal process just makes you more aware of it.
Products to avoid post-removal
Certain products can damage recovering lashes.
Waterproof mascara:
Biggest culprit for damage:
Why waterproof is problematic:
Removal difficulty:
- Requires oil-based or harsh removers
- Takes vigorous rubbing
- Stresses lashes during removal
- Undoes recovery benefits
- Counterproductive to healing
Formula issues:
- Contains drying ingredients
- Can make lashes brittle
- Harder to clean off completely
- Buildup more likely
- Damages lash structure
When it’s especially bad:
- During first 2 weeks post-removal
- If lashes already damaged
- If experiencing lash loss
- When growing lashes back
- Recovery period priority
Better alternatives:
Tubing mascara:
- Encases lashes in tubes
- Removes with warm water only
- No rubbing needed
- Slides off easily
- Much gentler option
Why tubing mascara better:
- Easy removal
- No harsh removers needed
- Doesn’t pull on lashes
- Clean removal every time
- Protects recovering lashes
Conditioning mascaras:
- Contains nourishing ingredients
- Supports lash health while wearing
- Gentle formulas
- Easy to remove
- Multiple benefits
My recommendation:
I tell all my clients: avoid waterproof mascara for at least 2 weeks post-removal. Better yet, switch to tubing mascara permanently. Your lashes will thank you. I made the switch years ago and my natural lashes are healthier than ever.
Lash curlers:
Mechanical stress to avoid:
Why curlers are damaging:
Mechanical pressure:
- Crimps lashes at pressure point
- Weakens lash structure
- Can cause breakage
- Creates weak spots
- Stress on recovering lashes
Timing of use:
- If used before mascara dries: pulling risk
- If used after mascara dries: brittle lashes break
- No perfect timing
- Risk regardless
- Better to avoid
Heated curlers worse:
- Heat plus pressure
- Double damage
- Can burn lashes
- Makes lashes brittle
- Absolutely avoid during recovery
Common curler mistakes:
Curling too hard:
- Applying too much pressure
- Crimping instead of curling
- Creates break points
- Visible damage
- Lashes snap off
Curling too long:
- Holding pressure too long
- Weakens lashes
- Can pull lashes out
- Stresses follicles
- More damage with time
Dirty curlers:
- Old mascara buildup
- Creates sticky surface
- Lashes stick and pull
- Bacteria risk
- Infection potential
Pulling motion:
- Tugging while releasing curler
- Yanking lashes
- Can rip lashes out
- Common mistake
- Very damaging
Alternatives to lash curlers:
Lifting mascara:
- Formula lifts lashes
- No mechanical stress
- Just brush upward
- Gentle approach
- Effective results
Lash lift treatment:
- Professional service
- Lasts 6-8 weeks
- No daily stress
- Semi-permanent curl
- Healthier than daily curling
When you might need treatment:
- If lashes very straight naturally
- After recovery period complete
- Professional application only
- Discuss with technician
- Consider carefully
Heated lash tools:
- Some electric options available
- Better than mechanical curlers
- Still not ideal during recovery
- Wait until lashes fully recovered
- Use sparingly if at all
Natural curl enhancement:
Mascara technique:
- Wiggle wand at base
- Sweep upward
- Let it dry
- Apply second coat same way
- Creates lift without tools
My curler experience:
I used a lash curler daily for years. My lashes got shorter and thinner. When I stopped using it, my lashes improved dramatically within 3 months. Now I only use lifting mascara. My lashes look better curled than they did with the curler, and they’re much healthier.
Oil-based eye makeup:
Problematic for several reasons:
Why oil-based products problematic:
Heaviness:
- Weighs down lashes
- Can cause drooping
- Makes lashes look sparse
- Uncomfortable feeling
- Interferes with natural curl
Buildup issues:
- Difficult to remove completely
- Accumulates on lash line
- Clogs follicles
- Prevents healthy growth
- Creates environment for bacteria
Removal difficulty:
- Requires more rubbing
- More product needed to remove
- Increased lash stress
- Counterproductive
- Damages recovering lashes
Interaction with lash serums:
- Can block serum absorption
- Reduces serum effectiveness
- Wastes money on serum
- Delays recovery
- Defeats purpose
Specific products to avoid:
Oil-based primers:
- Very heavy formulas
- Hard to remove
- Not necessary
- Skip entirely
- Regular mascara sufficient
Cream eyeshadows:
- Can migrate to lash line
- Creates buildup
- Difficult to clean
- Use powder instead
- Safer option
Heavy eyeliners:
- Especially crayon-type
- Require rubbing to remove
- Can pull on lashes
- Choose liquid or gel
- Lighter formulas better
Thick mascara formulas:
- Extra-volume types often oil-based
- Very heavy
- Difficult to remove
- Stress on lashes
- Choose lighter formulas
Better alternatives:
Water-based products:
- Lighter formulas
- Easier removal
- Less buildup
- Better for lash health
- Look for “water-based” label
Powder eyeshadows:
- No oil content
- Easy to remove
- Don’t migrate to lash line
- Wide variety available
- Safer choice
Gel eyeliners:
- Easier to remove than cream
- Stays put better
- Less tugging needed
- Good compromise
- Many options
Harsh makeup removers:
Can damage more than help:
Removers to avoid:
Alcohol-based removers:
Why alcohol is bad:
- Extremely drying
- Strips natural oils
- Makes lashes brittle
- Irritates skin
- Can burn eyes
Where it hides:
- Many “quick” removers
- Makeup wipes often contain alcohol
- Check ingredient labels
- “Denatured alcohol” is culprit
- Avoid completely
Long-term effects:
- Chronic dryness
- Lash breakage
- Thinner, weaker lashes
- Delayed recovery
- Not worth it
Waterproof makeup removers:
Why problematic:
- Very harsh formulas needed
- Work by breaking down tough products
- Also break down lash structure
- Necessary evil only when wearing waterproof
- Since you’re avoiding waterproof, don’t need these
Formula concerns:
- Strong solvents
- Can irritate eyes
- Require less gentle removal technique
- More rubbing needed
- Better options exist
Micellar water confusion:
Not all micellar water equal:
- Some are gentle and great
- Others contain harsh ingredients
- Read labels carefully
- Oil-based versions better for most
- Water-based okay if gentle formula
What to look for:
- Fragrance-free
- Ophthalmologist-tested
- Gentle formula
- Oil-based for thoroughness
- Good reviews from sensitive users
DIY removers to avoid:
Rubbing alcohol:
- Some online advice suggests this
- Terrible idea
- Will damage lashes and skin
- Never use straight alcohol
- Not even diluted
Hydrogen peroxide:
- Another bad suggestion sometimes seen
- Far too harsh
- Bleaching agent
- Can damage eyes
- Absolutely avoid
Harsh soaps:
- Bar soap
- Dish soap
- Hand soap
- All too harsh for eye area
- Dedicated eye products only
What to use instead:
Gentle cleansing oils:
- Specifically for eyes
- Dissolves makeup effectively
- Doesn’t require rubbing
- Rinses clean
- My preferred option
Gentle micellar water:
- Fragrance-free formula
- Ophthalmologist-tested
- For sensitive eyes
- Easy to use
- Effective and safe
Oil-free eye makeup removers:
- Gentle formulas
- Designed for eye area
- Won’t leave residue
- Easy removal
- Many options available
Products with these ingredients:
Beneficial ingredients:
- Chamomile (soothing)
- Aloe (calming)
- Vitamin E (conditioning)
- Panthenol (strengthening)
- Cucumber extract (gentle)
Extension adhesive removers:
Different from removal discussed earlier:
Why this is different topic:
During removal process:
- You used remover to take off extensions
- That was appropriate and necessary
- Proper use at proper time
- Under your control
- Careful application
Post-removal:
- No extensions remaining
- No need for adhesive remover
- Would only damage natural lashes now
- No purpose
- Avoid completely
Why people mistakenly use post-removal:
Residue panic:
- Feel small adhesive bits
- Think they need adhesive remover
- Actually just need thorough cleansing
- Regular gentle cleanser sufficient
- Patience better than harsh chemicals
Overzealous cleaning:
- Want everything “perfectly clean”
- Use too many products
- Over-strip natural oils
- Cause irritation
- Less is more
What to do instead:
If feel residue:
- Use gentle oil cleanser
- Q-tip with oil for precision
- Multiple gentle passes
- Patience
- Will come off without harsh chemicals
Daily cleaning:
- Regular facial cleanser
- Lash-safe formula
- Morning and night
- Thorough but gentle
- Maintains cleanliness without damage
False advertising to watch for:
“Lash growth” mascaras:
Why be skeptical:
- Mascara washes off daily
- Limited contact time
- Active ingredients need prolonged contact
- Marketing more than results
- Serum better for growth
What they might do:
- Condition lashes somewhat
- Less damaging than regular mascara
- Make lashes look fuller (temporarily)
- Not actually grow lashes
- Manage expectations
When they’re okay:
- If gentler formula than regular
- If don’t expect actual growth
- As daily mascara option
- Just understand limitations
- Combine with actual lash serum
“Strengthening” products:
What to know:
- Some actually do strengthen
- Many just marketing
- Check ingredient list
- Look for keratin, peptides, biotin
- Reviews from actual users
Good strengthening ingredients:
- Keratin
- Peptides (particularly myristoyl pentapeptide)
- Panthenol (Pro-Vitamin B5)
- Biotin
- Arginine
My product philosophy:
Keep it simple during recovery:
- Gentle cleanser
- Good lash serum
- Gentle mascara (if needed)
- That’s it
- Less is more
- Save money and get better results

FAQs
Common questions about individual lash removal.
How do you take off individual fake eyelashes safely?
The complete safe removal process:
Quick answer recap:
The essential steps:
- Apply oil-based remover to lashes
- Wait 5-10 minutes for adhesive to dissolve
- Gently slide each lash off from base to tip
- Never pull or tug
- Clean eyelids thoroughly after
Why this method works:
Chemical dissolution:
- Oil breaks down adhesive bonds
- Adhesive weakens progressively
- Mechanical force not needed
- Gentle chemistry does the work
- Science, not strength
Patience over force:
- Time allows proper dissolution
- Rushing causes damage
- Waiting prevents breakage
- Better results with patience
- Worth every minute
Directional removal:
- Base to tip follows natural lash
- Minimizes stress
- Prevents breakage
- Works with lash structure
- Not against it
Key safety principles:
If it resists, stop:
- Resistance means not ready
- More oil and time needed
- Never force removal
- Forcing guarantees damage
- Patience always wins
One lash at a time:
- Individual attention to each lash
- Can’t rush bulk removal
- Each lash applied individually
- Each lash removed individually
- Respect the process
Tools matter:
- Right tools make it easier
- Cotton rounds and Q-tips sufficient
- Tweezers for assistance only
- Never for pulling
- Proper tools prevent damage
When to seek professional help:
Consider professional removal if:
- First time removing individual lashes
- Nervous about process
- Previous bad experience
- Lashes applied professionally with strong adhesive
- Any uncertainty
Professional benefits:
- Experience handling difficult cases
- Professional-grade removers
- Proper technique guaranteed
- Quick and safe
- Costs $20-50 typically
DIY when appropriate:
- DIY-applied lashes
- Comfortable with process
- Have proper supplies
- Not rushed
- Confident in ability
My safety checklist:
Before I remove my lashes, I check:
- ✓ Have 30+ minutes uninterrupted
- ✓ All supplies gathered
- ✓ Good lighting
- ✓ Comfortable position
- ✓ Calm mindset
- ✓ No time pressure
- ✓ Patient attitude
If I can’t check all these boxes, I don’t start. I wait for the right time.
Can I use makeup remover for individual lashes?
It depends on the makeup remover type:
Yes, if oil-based:
Why oil-based works:
- Dissolves lash adhesive effectively
- Gentle on lashes
- Designed for eye area already
- Most accessible option
- Affordable
Good oil-based removers:
Cleansing oils:
- Specifically for makeup removal
- Effective on adhesive
- Rinses clean
- Available everywhere
- Multiple price points
Bi-phase removers:
- Oil and water layers
- Shake before use
- Very effective
- Popular option
- Works well
Balm cleansers:
- Solid that melts with warmth
- Very gentle
- Thorough removal
- Luxurious feel
- Effective option
Micellar water (oil-based formulas):
- Micelles attract oil and dirt
- Some formulas oil-based
- Check label
- Gentle and effective
- Easy to use
Coconut oil:
- Actually a “makeup remover”
- Removes makeup effectively
- Also removes lash extensions
- Cheap and accessible
- My top recommendation
Application for lash removal:
How to use makeup remover for lash removal:
- Saturate cotton round completely
- Press against closed eyelid
- Hold 5-10 minutes
- Gently wipe from base to tip
- Repeat as needed
Differences from regular makeup removal:
- Need longer contact time
- More product required
- More patience needed
- Multiple applications likely
- Thorough saturation essential
No, if water-based:
Why water-based doesn’t work:
Chemistry issue:
- Lash adhesive is oil-based or cyanoacrylate
- Water doesn’t dissolve these
- Like trying to mix oil and water
- Won’t work no matter how long you try
- Wasted time and effort
What happens when you try:
- Lashes stay firmly attached
- Frustration builds
- Temptation to pull increases
- Pulling causes damage
- Defeats entire purpose
Common water-based removers:
- Many gel removers
- Some micellar waters
- Foaming makeup removers
- Most “gentle” removers
- Check ingredient label
How to tell the difference:
Read the label:
- First ingredients tell you
- “Water” as first ingredient = water-based
- Oil as first ingredient = oil-based
- “Aqua” is water
- Ingredient order matters
Physical test:
- Pour small amount in bowl
- Does it mix with water or separate?
- Separation = oil-based (good)
- Mixes completely = water-based (won’t work)
- Quick test at home
Feel test:
- Oil-based feels slippery
- Water-based feels lighter
- Oil-based harder to rinse off
- Water-based rinses easily
- Touch can tell difference
Also avoid:
Makeup wipes:
Why wipes don’t work well:
Insufficient product:
- Not enough remover saturated in wipe
- Dries out quickly
- Can’t maintain contact long enough
- Adhesive needs prolonged exposure
- Wipes not designed for this
Requires rubbing:
- Wipe method inherently involves rubbing
- Rubbing stresses lashes
- Can pull out natural lashes
- Causes irritation
- Defeats gentle removal purpose
Not targeted enough:
- Wipes are for general makeup
- Lash removal needs precision
- Can’t hold wipe in place effectively
- Cotton rounds much better
- Wrong tool for job
When makeup wipes okay:
- For cleaning around eyes after removal
- For removing eye makeup before removal process
- Quick cleanup of residue
- General face cleaning
- Just not for actual lash removal
Alcohol-based removers:
Why avoid:
- Extremely drying
- Can irritate eyes
- Makes lashes brittle
- Harsh on skin
- May not even dissolve adhesive effectively
Where often found:
- “Quick” makeup removers
- Some wipes
- Travel-size removers
- Budget options
- Check ingredients always
Exceptions:
- Some professional lash adhesive removers contain small amounts
- Formulated specifically for safety
- Different from general alcohol removers
- Professional-grade only
- Not DIY options
My makeup remover recommendation:
I keep three products for lash removal:
- Coconut oil – my go-to, works every time
- Cleansing balm – when I want something fancier
- Professional lash remover – for super stubborn situations
Any oil-based makeup remover works. Don’t overthink it. Just check the ingredients and make sure oil comes before water.
How long does it take to remove individual lashes?
Realistic time expectations:
Average time: 30-45 minutes
Why it takes this long:
Soaking time:
- 5-10 minutes per application
- Usually need 2-3 applications
- Can’t rush this step
- Chemistry needs time
- Majority of time spent here
Actual removal time:
- 1-2 minutes per lash
- 20-60 lashes typically
- Some lashes stubborn
- Precision work takes time
- Can’t be rushed
Cleaning time:
- 5-10 minutes
- Thorough cleaning essential
- Checking for residue
- Double cleanse method
- Important final step
Time breakdown by experience level:
First time removing:
- 45-60 minutes typical
- Learning as you go
- More cautious approach
- Figuring out technique
- Completely normal
What takes longer first time:
- Reading instructions between steps
- Being extra careful
- Checking progress frequently
- Uncertainty about each step
- Learning curve natural
After several removals:
- 30-40 minutes
- Know what to expect
- Efficient technique developed
- Confidence helps speed
- Still shouldn’t rush
Experienced removal:
- 25-35 minutes
- Efficient but thorough
- Know when adhesive ready
- Smooth process
- Still takes time
Factors affecting time:
Number of lashes:
Partial set:
- Outer corners only: 15-20 minutes
- Just a few lashes: 10-15 minutes
- Fewer lashes = less time
- Proportional timing
- Still need same patience per lash
Full set:
- 40-60 lashes: 35-45 minutes
- Dense volume set: 45-60 minutes
- More lashes = more time
- Can’t skip steps to save time
- Each lash needs attention
Adhesive strength:
DIY adhesive:
- Usually weaker
- Dissolves faster
- 20-30 minutes typical
- Less stubborn
- Easier removal
Professional adhesive:
- Much stronger
- Takes longer to dissolve
- 40-60 minutes possible
- More resistant
- Need patience
Salon-applied lashes:
- Strongest adhesive
- Longest removal time
- 45-60+ minutes
- Consider professional removal
- May be worth it
Your technique:
Rushing:
- Actually takes longer
- Have to redo steps
- Causes damage requiring fixing
- Frustration wastes time
- Patience faster overall
Being thorough:
- Might seem slower
- Actually more efficient
- Do it right once
- No damage to repair
- Better time investment
Individual differences:
Dexterity:
- Some people naturally more coordinated
- Fine motor skills help
- Get better with practice
- Don’t compare to others
- Your pace is your pace
Perfectionism:
- Perfectionists take longer
- Check everything multiple times
- More thorough cleaning
- Not necessarily bad
- Depends on goals
When to allocate more time:
Allow extra time if:
- First time doing it
- Lashes applied professionally
- Wearing lashes long time
- Multiple layers of lashes
- Want to be extra careful
Plan for 60 minutes:
- Better to finish early
- Rushing causes mistakes
- Can’t pause mid-process easily
- Uninterrupted time essential
- Buffer time helpful
Speed tips that are actually safe:
Efficiency without rushing:
Preparation:
- Gather all supplies first
- Don’t search for things mid-process
- Everything within reach
- Set up comfortable space
- Saves interruption time
Both eyes same time for soaking:
- Apply oil to both eyes
- Let both soak simultaneously
- Remove one eye completely
- Then do second eye
- Cuts total time
However:
- Don’t try to remove both simultaneously
- Need one eye open to see
- Can’t rush removal step
- Soaking only step that overlaps
- Safety first always
Systematic approach:
- Work section by section
- Don’t jump around randomly
- Organized process faster
- Know where you are
- Less confusion
When you shouldn’t try to save time:
Wrong ways to “speed up”:
- ✗ Shorter soaking time
- ✗ Pulling resistant lashes
- ✗ Skipping cleaning step
- ✗ Rushing through removal
- ✗ Using harsh removers to “work faster”
All these cause damage and actually waste time fixing problems.
My time story:
My first individual lash removal took 75 minutes. I was terrified of damaging my lashes. I re-soaked everything three times. I checked every lash obsessively. But you know what? Zero damage. Zero lost lashes. Worth every minute.
Now I can do it in 30 minutes. But I still don’t rush. I still check thoroughly. I still wait for adhesive to fully dissolve. The time investment protects my natural lashes. That’s worth more than any saved minutes.
Will removing individual lashes damage my natural lashes?
Only if done incorrectly:
Short answer: No, when done properly
Proper removal doesn’t damage:
Why safe removal is safe:
No mechanical force:
- Oil does the work
- Chemistry, not pulling
- Adhesive dissolves completely
- Lashes slide off naturally
- No stress on natural lash
Following natural lash direction:
- Base to tip movement
- Works with lash structure
- Doesn’t bend lash unnaturally
- No opposing forces
- Biomechanically sound
Patient approach:
- Waiting for complete dissolution
- No forcing
- Responding to resistance
- Gentle throughout
- Respects lash integrity
What “proper removal” means:
Non-negotiable elements:
- Oil-based remover
- Adequate soaking time (5-10+ minutes)
- Gentle sliding motion only
- Never pulling or tugging
- Thorough cleaning after
Following all steps:
- Can’t skip steps
- Each step has purpose
- Shortcuts cause damage
- Complete process necessary
- All steps protect lashes
When damage occurs:
Improper removal causes damage:
Pulling or tugging:
- Most common cause
- Rips lashes out at follicle
- Breaks lashes mid-shaft
- Immediate damage
- Most serious mistake
What pulling causes:
- Natural lash loss
- Thinning lash line
- Bald patches possible
- Lash trauma
- Follicle damage
Recovery time:
- 4-8 weeks for new lash growth
- Full lash line: 2-3 months
- Permanent damage possible if severe
- Long-term consequences
- Prevention much better than cure
Insufficient soaking:
What happens:
- Adhesive not fully dissolved
- Removal requires force
- Force damages lashes
- Frustration leads to pulling
- Cascade of problems
Why people skip adequate soaking:
- Impatience
- Not realizing importance
- Thinking “close enough”
- Time pressure
- Underestimating need
Result:
- Breakage
- Lost lashes
- Damaged remaining lashes
- Frustration
- Regret
Using wrong removers:
Water-based products:
- Don’t dissolve adhesive
- People pull harder to compensate
- Pulling causes damage
- Wasted effort
- Entirely preventable
Harsh chemicals:
- Can weaken lash structure
- Make lashes brittle
- Cause breakage
- Irritation possible
- Unnecessary risk
Extent of damage:
Mild damage:
- Few lashes broken or lost
- Noticeable but not severe
- Grows back in 4-6 weeks
- Temporarily thinner appearance
- Recoverable
Moderate damage:
- Multiple lashes lost
- Visible thinning
- Some bald spots
- 6-8 weeks recovery
- Concerning but fixable
Severe damage:
- Many lashes ripped out
- Significant bald patches
- Follicle damage possible
- 2-3+ months recovery
- May need medical attention
Permanent damage:
- Rare but possible
- Follicle destruction
- Lashes may not grow back
- Requires medical intervention
- Entirely preventable
Comparing to extensions:
Extensions vs. individual lashes:
Professional extensions (when applied correctly):
- Don’t damage natural lashes
- Applied to healthy lashes only
- One extension per natural lash
- Proper weight distribution
- Safe when done right
Extensions damage when:
- Applied to immature lashes
- Too heavy for natural lash
- Multiple natural lashes glued together
- Poor quality adhesive
- Improper removal
Individual lashes (DIY):
- Similar safety profile when removed correctly
- Actually easier to remove safely than extensions
- More control over process
- Can see everything clearly
- Lower risk with proper technique
The key difference:
- Extensions: application matters most
- Individual lashes: removal matters most
- Both safe when done correctly
- Both damaging when done incorrectly
- Technique is everything
Protecting your lashes during removal:
Best practices:
Start conservative:
- When uncertain, wait longer
- More soaking never hurts
- Less soaking can hurt
- Err on side of caution
- Can’t over-soak
Listen to resistance:
- Any resistance = stop
- More oil and time
- Never force
- Physical feedback important
- Body tells you
Take breaks:
- Tired hands make mistakes
- Frustrated mind makes poor decisions
- Rest when needed
- Refresh perspective
- Better results when calm
Post-removal care:
- Lash serum
- Gentle products only
- Proper cleansing
- Adequate nutrition
- Support recovery
Signs you’re damaging lashes:
During removal:
- Feeling pulling sensation
- Pain or discomfort
- Lashes snapping off
- Natural lashes coming out with extension
- Resistance requiring force
After removal:
- Multiple natural lashes lost (more than 5)
- Broken lashes visible
- Bald patches
- Sore or irritated lash line
- Noticeable thinning
If you notice these:
- Stop immediately
- Don’t continue removing
- Apply more oil
- Wait much longer
- Consider professional help
My damage story:
I damaged my lashes once. Early in my career. I was running late. Tried to remove a full set in 15 minutes. Pulled when I felt resistance. Lost maybe 20 natural lashes that day.
It took 10 weeks for them to grow back. Every morning I looked in the mirror and saw those gaps. Every time I applied makeup. Every time a client asked about my lashes. Constant reminder.
I never rushed again. Ever. No appointment is worth damaging my lashes. No event is that important. I protect my natural lashes like they’re precious. Because they are.
Can you reuse individual fake lashes?
Sometimes yes, sometimes no:
Short answer: Yes, but with conditions
When you can reuse:
Lash condition matters:
Good candidates for reuse:
- Lashes still intact
- No damage to lash band or base
- Clean of adhesive residue
- Maintained shape
- No fraying or splitting
How to check:
- Visual inspection
- Hold up to light
- Check for integrity
- Look at adhesive area
- Assess honestly
Quality considerations:
High-quality lashes:
- Mink or silk usually reusable
- Synthetic depends on quality
- Premium lashes withstand cleaning better
- Hold shape through reuse
- Worth higher initial cost
Can get 3-5 uses typically:
- With proper care
- Gentle removal
- Thorough cleaning
- Proper storage
- Quality dependent
Budget lashes:
- Often one-time use
- Don’t withstand cleaning well
- Lose shape quickly
- Band weakens
- Usually not worth trying to reuse
When you can’t reuse:
Damage indicators:
Physical damage:
- Bent or misshapen
- Missing hairs
- Fraying ends
- Loose hairs falling out
- Band damaged
Adhesive issues:
- Adhesive stuck to lash permanently
- Can’t clean adhesive off
- Adhesive changed lash shape
- Residue affects appearance
- Not salvageable
Hygiene concerns:
- Visible dirt or makeup
- Can’t clean thoroughly
- Eye infection history while wearing
- Long time since worn
- Questionable cleanliness
How to clean for reuse:
Gentle cleaning method:
Step 1: Remove adhesive
- Immediately after removal
- While adhesive still somewhat soft
- Use tweezers
- Peel from outer edge inward
- Very gentle pulling
Technique:
- Hold lash steady
- Grasp adhesive edge with tweezers
- Slow, steady pull
- Base of lash outward
- Most adhesive should come off in strip
Step 2: Oil cleanse
- If adhesive remains
- Dip in coconut oil or cleansing oil
- Let soak 2-3 minutes
- Gently rub adhesive area with finger
- Should release easily
Step 3: Shampoo wash
- Use gentle, oil-free cleanser
- Baby shampoo works well
- Create lather with fingers
- Gently work through lashes
- Removes oil and dirt
Step 4: Rinse thoroughly
- Lukewarm water
- Hold under running water
- Ensure all product removed
- No residue remaining
- Clean feeling
Step 5: Reshape and dry
- Place on clean paper towel
- Reshape to original curve
- Can use clean spoolie to arrange
- Air dry completely
- Takes 2-3 hours
Proper storage:
Storage matters for reusability:
Original packaging:
- Best storage option
- Maintains shape
- Protects from dust
- Clean environment
- Reuse original case
Alternative storage:
- Small clean container
- Tissue paper protection
- Curve preserved
- Dust-free
- Organized system
What to avoid:
- Loose in makeup bag
- Crushed or compressed
- Exposed to dirt
- Humid environments
- Damaged storage ruins lashes
Quality assessment before reuse:
Inspection checklist:
- ✓ Shape maintained?
- ✓ All hairs intact?
- ✓ Band strong and flexible?
- ✓ Completely clean?
- ✓ No odor?
- ✓ Looks nearly new?
If any “no” answers:
- Don’t reuse
- Not worth the risk
- Appearance will be poor
- May damage natural lashes with damaged band
- Better to use new ones
Hygiene considerations:
When reuse is unsafe:
After eye infection:
- Never reuse
- Lashes can harbor bacteria
- Reinfection risk
- Discard immediately
- Not worth health risk
Questionable cleanliness:
- If unsure how clean
- If worn during illness
- If exposed to unsanitary conditions
- Better safe than sorry
- Discard and start fresh
Sharing concerns:
- Never share individual lashes
- Even with family
- Hygiene risk too high
- Eye infections spread easily
- Personal items only
How long can you keep them:
Shelf life:
- Unopened: 1-2 years
- After first use: 3-6 months maximum
- With proper storage and care
- Quality dependent
- Use judgment
Signs they’re too old:
- Band becomes brittle
- Lashes lose curl
- Discoloration
- Smell odd
- Generally degraded
When to just buy new:
- Budget lashes always
- After 5 uses even premium
- Any hygiene concerns
- Visible wear
- Lost original shape
Cost analysis:
Reusing makes sense when:
- Premium lashes ($10+ per pair)
- Only wore once or twice
- Excellent condition
- Proper cleaning supplies available
- Time to clean properly
Just buy new when:
- Budget lashes ($2-5 per pair)
- Wore multiple times
- Time-consuming to clean
- Condition questionable
- Convenience worth cost
My reuse practice:
I reuse my mink individual lashes. They cost $15-20 per set. I clean them immediately after removal. Takes 10 minutes. Store them in original packaging. Each set lasts 4-5 uses before I notice quality decline.
But my $3 drugstore lashes? One use only. Not worth my time to clean. I just buy new ones. The cost is so low that the convenience wins.
Quality matters. If you invest in good lashes and take care of them, reusing makes sense. If you buy budget options, treat them as disposable. Both approaches are valid.
How often should I remove my individual lashes?
Depends on several factors:
General guideline: Remove when needed
Typical wear time:
Average duration:
- 3-7 days typical
- Some people stretch to 10-14 days
- Quality and application affect duration
- Personal comfort determines timing
- No single “right” answer
What affects wear time:
Application quality:
- Professional application lasts longer
- Clean, precise DIY application: 5-7 days
- Quick, messy application: 2-3 days
- Technique matters significantly
- Experience improves duration
Adhesive strength:
- Professional adhesive: 7-14 days
- DIY adhesive: 3-7 days
- Strip lash adhesive: 1-2 days maximum
- Product quality matters
- Read product recommendations
Your lifestyle:
Activity level:
- Very active: shorter wear time
- Sedentary: longer wear time
- Sweat affects adhesive
- Water exposure matters
- Physical activity impacts duration
Skincare routine:
- Oil-based products shorten wear
- Minimal products extend wear
- Face washing technique affects
- Steam and heat weaken adhesive
- Routine adjustments needed
Natural oil production:
- Oily skin: shorter duration
- Dry skin: longer duration
- Can’t change this factor
- Work with your skin type
- Adjust expectations accordingly
Signs it’s time to remove:
Physical indicators:
Lashes lifting:
- Outer corners lifting first usually
- Inner corners may lift
- Band visible when lifting
- Looks messy
- Time to remove
Lashes shifting:
- No longer aligned properly
- Pointing odd directions
- Uncomfortable feeling
- Poking eye
- Definite removal time
Significant lash loss:
- Lost more than 30% of lashes
- Gaps visible
- Uneven appearance
- Looks worse than better
- Remove remaining lashes
Comfort issues:
Itching:
- Persistent itching
- Sign of irritation
- Possible allergic reaction
- Dirt/bacteria buildup
- Remove immediately
Pain or irritation:
- Any pain is bad sign
- Shouldn’t hurt at all
- Possible infection
- Adhesive reaction
- Immediate removal needed
Eye redness:
- Red lash line
- Bloodshot eyes
- Inflammation present
- Health risk
- See doctor if severe after removal
Aesthetic reasons:
Looking messy:
- Even if physically okay
- Appearance matters
- Professional/personal standards
- Event coming up
- Refresh time
Want different style:
- Change desired
- Remove old before applying new
- Don’t layer sets
- Clean slate better
- Style evolution
Special occasion:
- Want fresh, perfect look
- Remove 1-2 days before
- Let lashes rest briefly
- Apply fresh set day of event
- Optimal appearance
Recommended removal schedule:
Conservative approach:
- Remove every 3-5 days
- Gives lashes rest
- Minimizes buildup
- Maintains optimal hygiene
- Better for lash health
Benefits:
- Natural lashes stay healthier
- Less chance of infection
- Always looks fresh
- Less time for problems to develop
- Easier removal (less buildup)
Moderate approach:
- Remove every 7 days
- Weekly refresh
- Balances convenience and care
- Most common schedule
- Works for most people
Extended wear:
- Up to 14 days maximum
- Only with professional application
- Monitor carefully
- Clean daily religiously
- Not for everyone
When extended wear okay:
- Professional application
- High-quality products
- Strong adhesive used
- Proper daily cleaning
- No irritation
- Lashes still looking good
When to remove sooner than planned:
Don’t wait if:
- Any discomfort
- Visible lifting or shifting
- Special event coming
- Irritation developing
- Lashes looking messy
- Feeling gross
Health always priority:
- Convenience never worth infection risk
- Eye health irreplaceable
- Can always reapply
- Listen to your body
- Remove when uncertain
Between-wear rest periods:
Do lashes need breaks?
Short answer: Yes, helpful but not always necessary
Rest period benefits:
- Allows thorough cleaning
- Natural lashes fully assessed
- Any damage visible
- Lash serum application without interference
- Follicles “breathe”
Recommended rest:
- 1-2 days between applications ideal
- 24 hours minimum
- Longer if any irritation
- Assess natural lash health
- Apply serum during break
Continuous wear:
- Some people wear continuously
- Reapply immediately after removal
- Can work if very careful
- Monitor lash health closely
- Adjust if problems develop
My removal schedule:
For everyday wear: I remove after 5 days. Fresh application Sunday evening, remove Friday evening. Gives me weekend to let my lashes rest, apply serum, assess any issues.
For special events: I remove 2 days before. Apply fresh set day of event. Ensures perfect appearance when it matters most.
For vacations: I remove day before leaving. Don’t want to deal with removal/reapplication while traveling. Fresh-faced vacation is actually nice.
I’ve learned my lashes look and feel best with this schedule. Yours might be different. Pay attention to how your lashes respond and adjust accordingly.
Conclusion
Removing individual fake eyelashes safely is straightforward when you follow the right process.
Use an oil-based remover. Wait patiently for the adhesive to dissolve. Gently slide each lash off from base to tip. Never pull or tug. Clean your eyelids thoroughly afterward. These simple steps protect your natural lashes while achieving clean removal every time.
Your natural lashes are precious. They frame your eyes, protect your vision, and enhance your natural beauty. Treat them with the care they deserve. The extra minutes spent on proper removal will reward you with healthier, fuller lashes for years to come.
If you found this guide helpful, I’d love to hear about your lash removal experience. What techniques worked best for you? Did you encounter any challenges? Email me at contact@universebebautylashes.com or visit www.ublash.com for more lash care tips and premium lash extension products.
Take care of those beautiful lashes!
Fanny