Skip to content
You want to start offering lash extensions. But walking into a beauty supply store feels overwhelming—hundreds of products, confusing terminology, and no clear starting point.
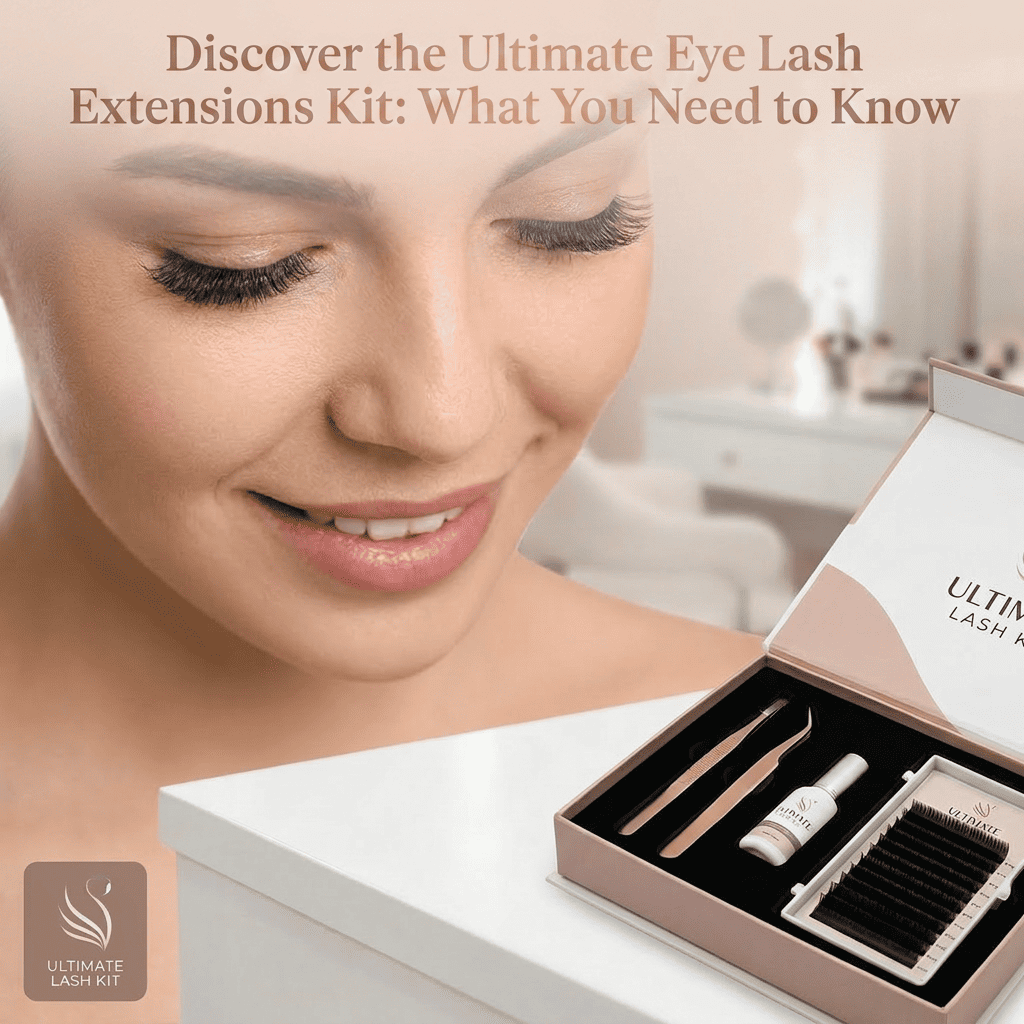
An eye lash extensions kit is a comprehensive collection of essential tools, adhesives, and lash products needed to apply professional eyelash extensions. A complete kit includes various lash types, professional-grade adhesive, precision tweezers, eye patches, and accessories that enable you to safely and effectively enhance clients’ natural lashes.
I’ve tested dozens of kits over the years. Let me show you exactly what you need and how to choose the right one for your situation.
What Exactly Is an Eye Lash Extensions Kit?
You might think any collection of lash supplies counts as a kit. But a true professional kit is carefully curated.
An eye lash extensions kit is a pre-assembled package containing all the fundamental products and tools required to perform eyelash extension services. It eliminates guesswork by bundling compatible products that work together, making it ideal for beginners or experienced artists wanting convenient restocking.

The Purpose Behind Lash Extension Kits
Kits serve multiple purposes beyond just bundling products together. They solve real problems for lash artists.
Key Benefits:
- Convenience: Everything arrives together in one purchase
- Cost savings: Bundled pricing beats buying items separately1
- Compatibility: Products are tested to work together2
- Learning tool: Helps beginners understand what they actually need
- Time-saving: No research needed to match products
I remember my first lash supply order. I spent three hours researching individual products, second-guessing every choice. When I finally placed the order, I realized I’d forgotten adhesive remover and micropore tape. A complete kit would have saved me that headache.
For established artists, kits provide convenient restocking. When you run low on multiple supplies simultaneously, ordering a replenishment kit beats creating a custom cart every time.
Different Types of Extension Kits Available
Not all kits serve the same purpose or skill level. Understanding the categories helps you choose correctly.
Kit Categories:
| Kit Type | Best For | Typical Contents |
|---|---|---|
| Beginner/Student Kit | New lash artists learning | Basic tools, practice lashes, instructional materials |
| Professional Starter Kit | Trained artists launching businesses | Full product range, professional-grade adhesives |
| Specialty Kit | Specific techniques | Volume fans, mega volume supplies |
| Refill/Maintenance Kit | Restocking essentials | Commonly depleted items like adhesive, lashes |
| Travel/Mobile Kit | Artists working on-location | Compact versions of essential tools |
When I started my lash business, I bought a student kit thinking I’d save money. Big mistake. The adhesive was low-quality, the tweezers didn’t grip properly, and I had to replace everything within two months. Invest in professional-grade kits from the start if you’re serious about this career.
What Are the Essential Components Every Professional Kit Needs?
A complete professional kit contains specific categories of products. Missing even one category limits your service quality.
A professional lash extension kit must include multiple lash types in various curls and lengths, professional-grade adhesive suitable for your climate, precision isolation and application tweezers, under-eye patches, micropore tape, adhesive remover, lash primer, and organizational tools like a lash tile or palette.

Types of Lashes You Need in Your Arsenal
Your lash selection determines what looks you can create for clients. Variety matters tremendously.
Essential Lash Types:
Classic Lashes:
- Single extension applied to one natural lash
- Creates natural to moderate volume
- Requires lengths from 6mm to 15mm
- Multiple curls: J, B, C, D, L
Volume Lashes:
- Multiple thin extensions create one fan
- Achieves dramatic, fluffy appearance
- Requires 0.03-0.07mm diameter lashes
- Pre-made fans or loose lashes for handmade fans
Specialty Lashes:
- Colored lashes for creative looks
- Textured lashes for unique effects
- Bottom lashes for complete transformations
When selecting lashes for your kit, consider your target clientele [3]. If you’re serving clients who want natural enhancement, focus on classic lashes in natural curls. If you’re targeting clients seeking dramatic effects, invest more heavily in volume lash options [3].
I stock primarily C and D curls in my kits because they suit most eye shapes and preferences. I keep J and B curls for the occasional client with extremely straight natural lashes or those wanting subtle lifts.
Adhesives and Why They’re Your Most Critical Component
Your adhesive choice directly impacts retention, client comfort, and your reputation. Never compromise here.
Adhesive Considerations:
When selecting adhesives, you must consider several crucial factors [2]:
- Drying Time: Fast-drying adhesives (1-2 seconds) suit experienced artists. Slower adhesives (3-5 seconds) give beginners more working time.
- Bonding Strength: Professional adhesives provide secure, long-lasting bonds that maintain extensions for weeks [5].
- Flexibility: Good adhesives remain flexible after curing, moving naturally with lashes [5].
- Sensitivity: Some clients need sensitive formulas with lower fume levels.
Your working environment affects adhesive performance. Temperature and humidity dramatically impact drying time and retention. I learned this the hard way when I moved my studio to a drier climate. My usual adhesive suddenly wasn’t performing—extensions were falling off within days. I had to switch to a formula designed for lower humidity.
Always stock at least two adhesive options—one for normal applications and one sensitive formula for clients with reactive eyes. This flexibility prevents you from turning away paying clients.
Tools and Accessories That Complete Your Kit
Beyond lashes and adhesive, specific tools make application possible and professional.
Must-Have Tools:
Tweezers (Minimum Two Pairs):
- Isolation tweezers: Separate individual natural lashes
- Application tweezers: Pick up and place extensions
- Consider curved, straight, or volume tweezers based on technique
Protection and Comfort Items:
- Under-eye gel patches: Protect lower lashes and skin
- Micropore tape: Secure patches and isolate lashes
- Eye pads: Alternative to gel patches
Application Aids:
- Lash tile or palette: Organize lashes during application
- Glue rings: Hold adhesive drops close to working area
- Nano misters: Speed adhesive curing
- Air blowers: Dry adhesive and reduce fumes
Maintenance Products:
- Lash primer: Clean natural lashes before application [5]
- Adhesive remover: Safely remove extensions when needed
- Lash brushes: Client aftercare and daily grooming
Quality matters enormously with tools [4]. I initially bought cheap tweezers from a general beauty supplier. They misaligned after two weeks, making precise isolation impossible. Professional lash-specific tools last years with proper care.
How Do You Choose the Right Kit for Your Specific Needs?
With hundreds of kits available, selection naturally feels paralyzing. However, asking the right questions simplifies the decision.
Specifically, choose a lash extension kit by first evaluating your skill level, target clientele, budget constraints, and whether you need portability. Furthermore, consider product quality ratings, manufacturer reputation, kit comprehensiveness, and whether included products match your preferred techniques and working environment conditions.

Critical Factors That Should Guide Your Decision
Don’t just buy the cheapest kit or the one with the prettiest packaging. Evaluate these factors systematically.
Selection Criteria:
Skill Level Matching:
- Beginners need comprehensive kits with instructional materials
- Intermediate artists benefit from technique-specific kits
- Advanced artists may prefer customizable professional kits
Quality Indicators:
When choosing accessories and products, quality must be your priority [4]. Look for:
- Manufacturer certifications and safety compliance
- Customer reviews from actual lash artists
- Product compatibility guarantees [4]
- Clear ingredient lists for adhesives
Business Requirements:
- Mobile artists need compact, travel-friendly kits
- Studio-based artists can choose larger, comprehensive sets
- High-volume businesses need bulk quantities
Budget Realities:
- Cheaper kits often mean replacing products quickly
- Mid-range kits balance quality and affordability
- Premium kits include superior products but require larger investment
<p>I always tell new artists to budget more than they initially plan. The $50 kit might seem attractive, but if you replace everything in two months, you’ve actually spent more than investing in a $150 quality kit upfront.
Comparing At-Home Kits Versus Professional Options
At-home DIY kits and professional kits serve completely different purposes. Understanding the distinction prevents disappointment.
Key Differences:
| Feature | At-Home Kit | Professional Kit |
|---|---|---|
| Adhesive Strength | Weaker, temporary bond | Professional-grade, long-lasting |
| Application Difficulty | Simplified for self-application | Requires training and practice |
| Results Duration | Days to one week | 3-6 weeks with proper care |
| Safety Standards | Variable quality control | Professional safety requirements |
| Cost | $20-$50 | $150-$500+ |
| Included Training | Basic instructions | Assumes professional training |
At-home kits are designed for personal use by untrained individuals. They prioritize safety over performance—weaker adhesives prevent serious mistakes but also mean poor retention.
Professional kits assume you have proper training. The adhesives are stronger, the lashes are higher quality, and the tools require skill to use effectively. Never use a professional kit without training. I’ve seen the damage that untrained application can cause—from eye infections to permanent natural lash loss.
If you’re considering starting a lash business, invest in professional training first, then purchase a professional kit. If you just want to experiment with extensions for yourself, stick with at-home options or visit a professional.
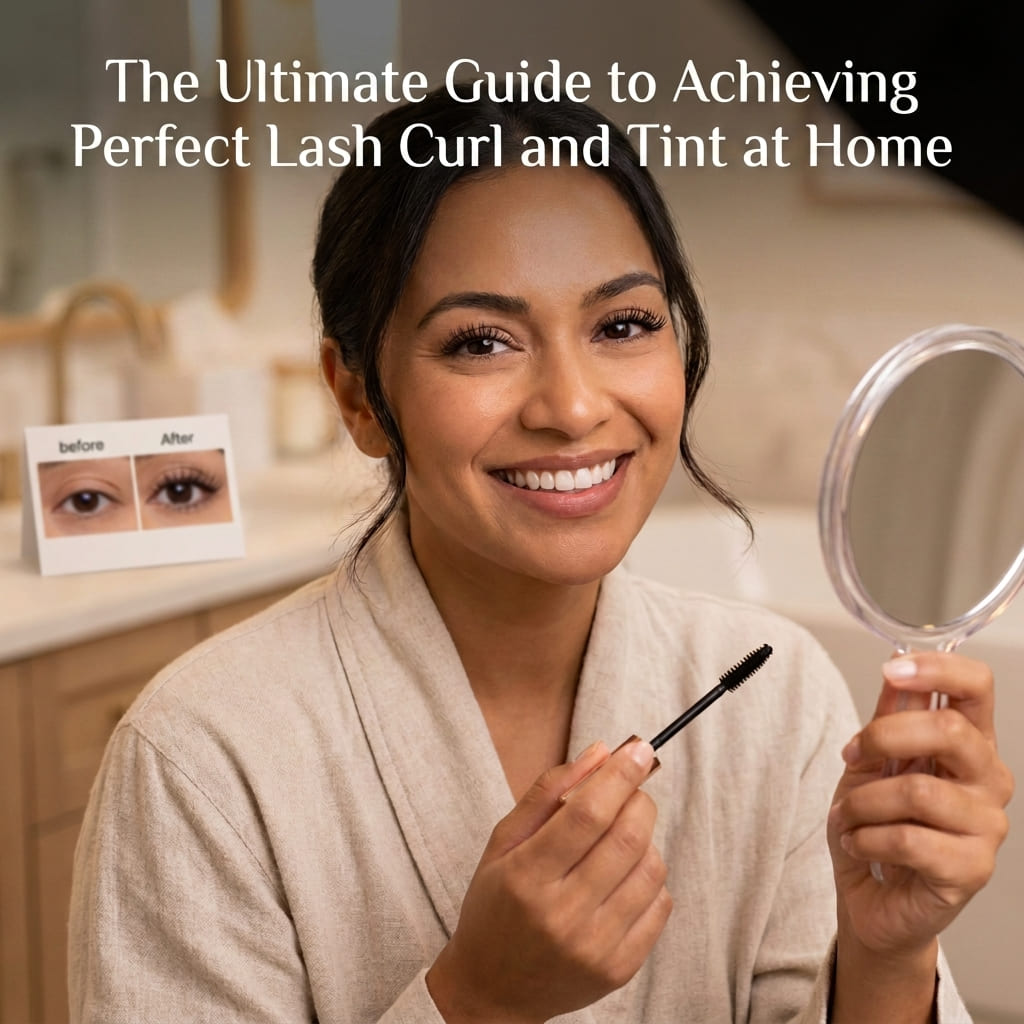
What’s the Proper Way to Apply Lash Extensions from Your Kit?
Having the right kit is only half the equation. Proper application technique determines your results and client satisfaction.
Apply lash extensions by thoroughly cleaning natural lashes with primer, isolating individual natural lashes with isolation tweezers, dipping extensions in adhesive with proper amount, placing extensions 0.5-1mm from the lash line, and ensuring no natural lashes stick together. Complete proper curing and client aftercare education.

Step-by-Step Application Process
Let me walk you through the exact process I use with every client. This systematic approach ensures consistent results.
Pre-Application:
- Clean natural lashes thoroughly with lash primer [5]
- Remove any oil, dirt, or residue that hinders adhesion [5]
- Apply under-eye patches or tape to protect lower lashes
- Assess natural lash health and discuss desired look with client
During Application:
- Organize your lash selection on a lash tile by length and curl
- Pour a small adhesive drop on a glue ring
- Isolate a single natural lash using isolation tweezers
- Pick up an extension with application tweezers
- Dip the base in adhesive (not too much—this is critical)
- Place extension on natural lash 0.5-1mm from skin
- Hold for 1-2 seconds until adhesive sets
- Repeat for desired fullness and coverage
Post-Application:
- Use a nano mister to cure adhesive properly
- Gently brush through completed lashes
- Check for any stuck lashes or adhesive clumps
- Provide aftercare instructions to client
The most crucial step? Proper natural lash cleaning with primer before starting [5]. I used to skip this step when I was rushing between clients. My retention rates were inconsistent until I committed to never skipping preparation. Clean lashes accept adhesive better and hold extensions longer [5].
Common Mistakes That Ruin Results
Even experienced artists make these errors. Awareness helps you avoid them.
Application Errors to Avoid:
Too Much Adhesive:
Using excess adhesive creates clumping, discomfort, and poor retention. You need only a tiny amount on the base of each extension. If you see white residue after application, you’re using too much.
Improper Isolation:
Sticking multiple natural lashes together causes breakage as they grow at different rates. Always ensure complete isolation before placing each extension.
Wrong Placement:
Placing extensions too close to the lash line irritates the eyelid. Too far from the base looks unnatural and affects retention. Aim for 0.5-1mm from the skin consistently.
Skipping Lash Mapping:
Starting without a plan creates uneven or unflattering results. Map out your length placement before applying the first extension.
Rushing the Process:
Quality lash application takes time. Full sets require 90-120 minutes for classic, longer for volume. Rushing leads to sloppy work and unhappy clients.
I once tried to complete a full set in 60 minutes because I had back-to-back appointments. The results were terrible—uneven lengths, several stuck lashes, and poor adhesive bonding. The client never returned. Never sacrifice quality for speed.
How Do You Maintain Extensions and Care for Your Kit?
Your investment in a quality kit deserves proper maintenance. Care extends product life and ensures consistent performance.
Maintain lash extensions by avoiding oil-based products near eyes, brushing lashes daily with a clean spoolie, keeping extensions dry for 24-48 hours after application, and scheduling regular fills every 2-3 weeks. Care for your kit by storing adhesive properly, cleaning tweezers after each use, and replacing products before expiration.

Client Extension Maintenance Tips
Educating clients about proper aftercare directly impacts your retention rates and reputation. Make this a priority.
Essential Aftercare Instructions:
First 24-48 Hours:
- Avoid getting lashes wet1
- Skip steam rooms, saunas, and hot showers
- Don’t use oil-based products near eyes
- Avoid rubbing or touching extensions
Ongoing Care:
- Brush lashes daily with a clean spoolie
- Clean lash line gently with lash-safe cleanser
- Sleep on back or use a silk pillowcase
- Remove eye makeup carefully with oil-free remover
- Book fills every 2-3 weeks for best appearance2
I provide every client with a printed aftercare card and a complimentary lash brush. This small investment dramatically improves their experience and my retention statistics. Happy clients with long-lasting extensions become your best marketing.
Proper Kit Storage and Product Care
Your kit components need specific care to maintain effectiveness and safety.
Kit Maintenance Guidelines:
Adhesive Storage:
- Store unopened bottles in cool, dark place
- Keep opened bottles in airtight container with silica packets
- Replace every 4-6 weeks after opening
- Never refrigerate (causes condensation)
- Check consistency before each use
Tool Cleaning:
- Clean tweezers with alco
hol after every client
- Remove adhesive buildup with acetone
- Store in protective case to maintain alignment
- Sharpen or replace when grip weakens
Lash Storage:
- Keep lash trays sealed wh
en not in use
- Store in cool, dry environment
- Organize by curl and length for
- easy access
- Replace any contaminated lashes immediately
General Organization:
- Designate specific storage location for kit
- Create inventory system to track supplies
- Note expiration dates on all products
- Keep workspace clean and professional
I learned about proper adhesive storage the expensive way. I was storing opened bottles in my workspace drawer without airtight protection. The adhesive degraded rapidly, becoming stringy and ineffective. After proper storage, my bottles maintain quality for their full lifespan.
Consider investing in a dedicated storage case or cabinet for your kit. Professional organization impresses clients and makes your work more efficient. When everything has its place, you waste less time searching for tools during application.
Conclusion
Your lash extension kit is your business foundation. Therefore, choose quality components that match your skill level and target clients. Specifically, include essential lash types, professional adhesive, precision tools, and proper accessories.
To begin, evaluate your needs honestly. For instance, if you’re beginning, invest in a comprehensive starter kit from a reputable manufacturer. Conversely, if you’re established, upgrade individual components as budget allows.
Ultimately, remember—your kit quality directly affects your results, client satisfaction, and ultimately your income. As a result, this is not the place to cut corners.
So, ready to build your lash business with quality supplies? Contact me atcontact@universebebautylashes.com or visit www.ublash.com. Furthermore, we offer professional lash extension kits with low MOQs and customizable packaging to help you create your unique brand identity.
- “Can You get Eyelash Extensions Wet?”, https://www.skinworks.edu/blog/can-you-get-eyelash-extensions-wet/. This source explains why avoiding water exposure in the first 24-48 hours is critical for lash adhesive curing. Evidence role: mechanism; source type: research. Supports: Clients should avoid getting their lash extensions wet during the first 24-48 hours after application to ensure proper adhesive curing.. Scope note: The advice may depend on the specific adhesive used by the technician. ↩ ↩
- “How to Take Care of Your Eyelash Extensions During the Summer”, https://www.skinworks.edu/blog/how-to-take-care-of-your-eyelash-extensions-during-the-summer/. This source supports the recommended frequency for lash extension fills to maintain their appearance and longevity. Evidence role: expert_consensus; source type: education. Supports: Clients should book fills every 2-3 weeks to maintain the best appearance of their lash extensions.. Scope note: The recommendation may vary depending on individual lash growth cycles and extension types. ↩ ↩