Skip to content
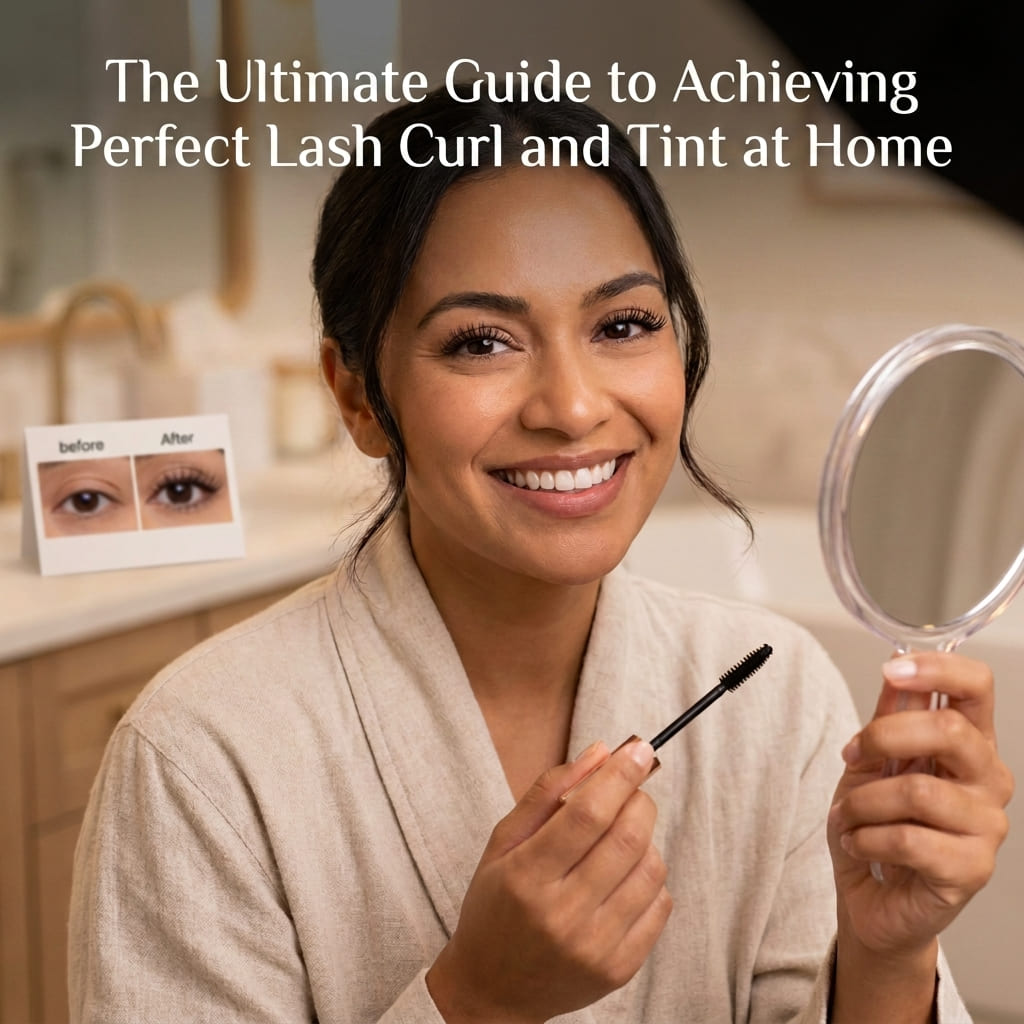
Lash curl and tint is a semi-permanent treatment that lifts your natural lashes from the root while adding color depth, creating the appearance of longer, fuller lashes without mascara or extensions. The process uses a chemical lifting solution to reshape lash structure and dye to darken lashes, lasting 6-8 weeks with proper care and creating a dramatic yet natural enhancement.
I’ve helped countless clients achieve this look professionally, and now I’ll show you how to safely do it at home. Let me guide you through every step.
What Exactly Are Lash Curl and Tint?
You might have heard these terms but aren’t quite sure what they mean or how they differ from other lash treatments.
Lash curl, also known as lash lift, is a treatment that involves applying a chemical solution to the lashes, lifting them from the root to create a more upward curl [5](). Lash tinting adds color and definition to the lashes using specialized dye [2](). Together, these treatments enhance your natural lashes by adding both curl and depth, making them appear longer and more prominent without extensions.
Understanding the Lash Lifting Process
The curl or lift component works by restructuring your natural lashes. It’s similar to a perm but specifically designed for delicate lash hair.
The process involves applying a chemical solution to your lashes while they’re positioned on a curved silicone shield. This solution breaks down the bonds in your lash hair structure, allowing them to conform to the shield’s curve. A setting solution then reforms these bonds in the new lifted position [5]().
Lash lift is a temporary treatment that lasts for several weeks [5](). Unlike eyelash extensions that add artificial lashes, lash lift primarily enhances the natural curl of the lashes, giving them a lifted and more open appearance [4]().
The lifting solution is applied to the base of the lashes [4](), which is why the curl starts from the root rather than just curling the tips like a mechanical eyelash curler would.
Understanding the Lash Tinting Process
Tinting complements the lift by adding color depth to your lashes. Many people have naturally light-colored lash tips that make lashes appear shorter than they actually are.
The tint itself adds color and definition to the lashes [2](). Professional tinting uses specialized eyelash dye formulated specifically for use near eyes. These dyes are different from hair color—they’re gentler and designed for the delicate eye area.
The dye is applied after the lifting process and left on for the appropriate amount of time to achieve the desired color [6](). Most people choose black or dark brown tints, but some opt for softer browns for a more natural look.
It is generally not necessary to use an eyelash curler with lash tinting, as the tint itself adds color and definition to the lashes [2](). In fact, using an eyelash curler after tinting may disturb the tint and affect the results [2]().
Key Benefits That Make This Treatment Popular
The combination of curl and tint offers advantages that daily makeup simply cannot match.
Primary Benefits:
Time-Saving:
Imagine waking up with perfectly curled, defined lashes every single day. No more rushing through your mascara routine. No more eyelash curler pinching. You literally wake up ready.
Natural Enhancement:
Unlike extensions, you’re working with your own lashes. The result looks completely natural because it IS natural—just enhanced. Nobody will know you’ve had a treatment unless you tell them.
Low Maintenance:
After the initial treatment, maintenance is minimal. No daily application or removal. No worrying about smudging or flaking. Just beautifully lifted, tinted lashes that last weeks.
Water-Resistant:
You can swim, shower, cry, and sweat without worrying about your lashes. Once the treatment sets, water won’t affect it.1 This is especially valuable for active lifestyles or humid climates.
Cost-Effective:
Compared to the ongoing cost of quality mascara, eyelash curlers that need replacing, and potentially lash extensions, curl and tint treatments are remarkably economical. One treatment lasts 6-8 weeks.2
I had a client who calculated she spent $45 monthly on waterproof mascara and $25 quarterly on eyelash curlers. After switching to regular lash lifts and tints, she actually saved money while getting better results.
How Do You Prepare for At-Home Lash Curl and Tint?
Jumping straight into the treatment without proper preparation leads to disappointing results or safety issues. Preparation is crucial.
Prepare for at-home lash curl and tint by selecting a quality eyelash lift kit with all necessary components, gathering required tools like cotton pads and micro brushes, conducting a patch test 24-48 hours beforehand, ensuring clean lashes free from makeup or oil, and setting up in a well-lit, comfortable space where you can recline safely.

Choosing the Right Eyelash Lift Kit
Not all at-home kits are created equal. The quality of your kit directly impacts your results and safety.
Essential Kit Components:
A comprehensive at-home kit should include:
- Lifting solution (perming solution)
- Setting solution (neutralizer)
- Tinting dye
- Developer for the dye
- Silicone lift shields in multiple sizes
- Adhesive for shields
- Micro brushes or applicators
- Eye pads or stickers for lower lash protection
- Nourishing serum or aftercare product
Quality Indicators:
Look for kits that include:
- Clear, detailed instructions with photos
- Ingredients list for all solutions
- Safety warnings and contraindications
- Appropriate pH-balanced formulas
- Positive reviews from actual users
- Customer support contact information
Avoid extremely cheap kits that seem too good to be true. The chemicals used in lifting and tinting must be gentle enough for the delicate eye area but effective enough to work. Quality ingredients cost money.
I tested a $15 kit once out of curiosity. The lifting solution was so harsh it made my eyes water even though none got in them. The tint was patchy and uneven. I ended up with irritated eyelids and disappointing results. Quality matters enormously here.
Essential Tools and Products You’ll Need
Beyond what’s included in your kit, gather these additional supplies to make the process safer and easier.
Additional Supplies:
Supplies For Application:
- Small timer or phone with alarm
- Good mirror, preferably magnifying
- Cotton pads and cotton swabs
- Tweezers for precise positioning
- Paper towels
- Small bowl of clean water
- Lint-free wipes
For Comfort:
- Comfortable reclining chair or position
- Pillow for neck support
- Good lighting source
- Relaxing music (you’ll be lying still for 45+ minutes)
For Safety:
- Contact lens case and solution (if you wear contacts)
- Saline eye wash just in case
- Clean towel
- Your phone nearby for emergencies
Having everything organized and within reach before you start prevents you from having to search for items with solution on your lashes. Trust me, trying to find a timer while your lashes are processing is stressful.
Critical Safety Precautions
This treatment involves chemicals near your eyes. Taking safety seriously isn’t optional.
Safety Requirements:
Patch Test:
First and foremost, always conduct a patch test 24-48 hours before the full treatment. To clarify, apply a small amount of lifting solution and tint to the inside of your elbow. Then, check for any redness, itching, or irritation. If any reaction occurs, do not proceed with the treatment.
In addition, read the instructions thoroughly. Rather than skimming, ensure you read them completely at least twice before starting. Keep in mind that different kits have varying timing and application methods, so careful attention to detail is essential.
Check Contraindications:
Don’t perform this treatment if you have:
- Active eye infections or styes
- Very sensitive eyes or skin
- Recent eye surgery (wait at least 3 months)
- Extremely damaged or over-processed lashes
- Allergies to common cosmetic ingredients
Work Clean:
Wash your hands thoroughly before starting. Use clean tools. Don’t reuse applicators or contaminate solutions.
Never Rush:
Give yourself plenty of time. Rushing leads to mistakes. Plan for at least 90 minutes from start to finish, especially for your first attempt.
Have Help Available:
Ideally, have someone nearby who can assist if needed. At minimum, keep your phone accessible in case of emergency.
What’s the Step-by-Step Process for Lash Curl and Tint?
Now let’s walk through the actual treatment process. I’ll break it down into manageable steps with clear timing.
The lash curl and tint process begins with a consultation to understand the desired outcome [1](), followed by thorough lash cleansing [1](), shield application, lifting solution processing, setting solution application, tinting with appropriate processing time [6](), neutralizing to stop the lifting process [6](), and finishing with nourishing aftercare products [3]()[6]().

Step 1: Lifting Your Lashes
The lifting portion comes first. This creates the curl that makes your lashes appear longer and more open.
Pre-Treatment Preparation:
Before applying any solutions, proper preparation is essential to ensure the best results. To begin with, consult with yourself about your desired outcome and assess the suitability of the treatment for your natural lashes. In other words, take a moment to evaluate your lashes critically—are they healthy enough to undergo chemical processing?
After that, cleanse your lashes thoroughly to remove any makeup, oil, or residue. More specifically, use an oil-free cleanser and be meticulous in your cleaning process. Bear in mind, any residual oil can hinder proper solution adhesion and significantly affect the outcome.
Finally, if you wear contact lenses, make sure to remove them. Even though your eyes will remain closed throughout the procedure, it is safer to take this precaution.
<h6>Shield Selection and Application:
Choose the appropriate silicone shield size based on
your eye shape and desired lift intensity. Smaller shields create more dramatic curls. Larger shields create softer, more natural lifts.
Apply a thin layer of adhesive to the back of the shield. Position it on your eyelid, ensuring it sits flush against your lash line without gaps.
Lash Positioning:
Apply a small amount of adhesive to the surface of the shield. Using a lash wand or micro brush, carefully brush your lashes upward onto the shield. Each lash should lie straight without crossing over others.
This step requires patience and precision. Take your time ensuring every lash is properly positioned. Uneven positioning creates uneven results.
Lifting Solution Application:
Using a micro brush, apply lifting solution to your lashes from root to tip, avoiding the very base near your skin. Ensure complete coverage of every lash.
Cover with plastic wrap or a provided cover to prevent drying. Set your timer according to kit instructions—typically 8-12 minutes depending on your lash texture.
Processing Time:
- Fine lashes: 6-8 minutes
- Medium lashes: 8-10 minutes
- Coarse lashes: 10-12 minutes
Never exceed the maximum recommended time. Over-processing causes permanent damage.
Solution Removal:</strong></strong>
When the timer goes off, carefully remove all lifting solution using a damp cotton pad or micro brush. Be thorough—any residual solution continues processing.
Setting Solution:
Immediately apply setting solution using the same technique. This neutralizes the lifting process and stabilizes the lashes in their new curved position [6](). Process for the same duration as the lifting solution.
Remove completely with damp cotton pads when finished.
Step 2: Tinting Your Lashes
With the curl established, tinting adds the color depth that creates definition.
Choosing Your Tint Color:
Most kits include black or dark brown tint. Black creates the most dramatic results and works for most people. Dark brown offers a softer, more natural look that suits lighter hair colors or those who prefer subtlety.
Some kits offer additional colors like medium brown or even blue-black. Choose based on your natural coloring and desired intensity.
Mixing the Tint:
Follow your kit’s instructions for mixing tint with developer. The ratio matters—too much developer makes the tint weak, too little makes it thick and hard to apply.
Mix thoroughly until you achieve a smooth, creamy consistency. Use immediately after mixing—tint begins oxidizing once mixed.
Tint Application:
Using a clean micro brush, apply tint generously to your lashes from root to tip. Ensure complete, even coverage. The tint should coat every lash thoroughly.
Be careful not to get tint on your eyelid skin. If you do, wipe it away immediately with a damp cotton swab.
Processing Time:
Leave the tint on for the appropriate amount of time to achieve the desired color [6](). Most kits recommend 5-10 minutes. Longer processing creates darker results, but never exceed the maximum time.
Tint Removal:</strong>
<p>When time is up, remove the tint using damp cotton pads. Wipe gently but thoroughly until all tint is removed. You may need several cotton pads to remove it completely.<h3>Step 3: Finishing Touches and Cleanup
The chem
ical processes are complete, but proper finishing ensures optimal results.
Neutralizing:
Some kits include a separate neutralizing solution to stop the lifting process and stabilize the lashes [6](). If your kit includes this, apply it according to instructions after removing the tint.
Cleansing:</strong>
Cleanse the lashes to remove any remaining products [6](). Use provided cleansing solution or oil-free micellar water. Be gentle but thorough.
Nourishing Treatment:
Apply the nourishing lash conditioner or serum included in your kit [3]()[6](). This step is crucial—it helps repair and strengthen lashes after the chemical processing.
Shield Removal:
Carefully detach your lashes from the shield by gently brushing them with a clean spoolie. Remove the shield from your eyelid slowly and gently.
Final Brushing:
Brush through your lashes with a clean spoolie to separate them and reveal the final results.
Stand back and admire your work. The full results will develop over the next 24 hours as the curl continues to set.
How Do You Maintain Your Lash Curl and Tint?
Your beautiful results can last 6-8 weeks with proper care. Maintenance determines whether you get maximum longevity or watch your treatment fade prematurely.
Maintain your lash curl and tint by following aftercare instructions including avoiding water, heat, and oil-based products for a specific period [3](), brushing lashes daily with a clean spoolie, using oil-free cleansers and makeup removers, and applying nourishing lash serums to keep lashes healthy and conditioned throughout the treatment period.

Essential Aftercare Instructions
The first 24-48 hours are absolutely critical. The bonds in you
r lashes are still fully setting during this time.
Immediate Aftercare (First 24-48 Hours):
Aftercare instructions should include avoiding water, heat, and oil-based products for a specific period [3](). This means:
No Water:
Keep your lashes completely dry. Don’t wash your face directly, avoid showers that hit your face, and definitely no swimming. Even humidity can affect the setting process.
No Heat:
Avoid saunas, steam rooms, hot yoga, and standing over steaming pots while cooking. Heat and moisture disrupt the setting bonds.
No Eye Makeup:
Resist applying any mascara or eye makeup for the full 48 hours. Your lashes need to remain completely undisturbed.
No Touching:
Don’t rub your eyes or play with your lashes. The oils from your fingers can affect the treatment.
Sleep Carefully: Try to sleep on your back if possible. Pressing your face into a pillow can flatten the curl before it’s fully set.
Ongoing Maintenance Tips
After the initial 48-hour period, maintenance becomes simpler but remains important.
Daily Care:
Gentle Cleansing:
When washing your face, be gentle around your eye area. Use oil-free cleansers and avoid rubbing or pulling on lashes. Pat dry with a soft towel rather than rubbing.
Daily Brushing:
Brush your lashes gently every morning with a clean spoolie. This keeps them separated, prevents tangling, and maintains the lifted appearance.
Product Selection:
Avoid oil-based makeup removers, cleansers, moisturizers, or serums near your eyes. Oil breaks down the lift and causes premature dropping. Always choose oil-free or water-based products.
Mascara Use:
If you choose to wear mascara (though you probably won’t need it), select water-based formulas. Apply gently without excessive rubbing. Remove it carefully each night with oil-free remover.
Products That Enhance Longevity
Supporting your treated lashes with appropriate products extends their life and health.
Recommended Products:
Lash Conditioning Serums:
Use a nourishing serum or conditioner. Look for products containing keratin, biotin, or peptides. Apply 2-3 times weekly to the length of your lashes, avoiding the base where they meet your eyelid.
Oil-Free Eye Makeup Remover:
Keep a high-quality, oil-free makeup remover on hand for the occasional times you wear eye makeup. Micellar water works excellently for this purpose.
Gentle Eye Cleanser:
Use a specialized lash cleanser or gentle, oil-free facial cleanser for your daily eye area cleaning routine.
Clean Spoolie:
Keep a dedicated clean spoolie just for your lashes. Replace it monthly or clean it weekly with antibacterial soap.
Protecting Your Investment:
Think of your lash lift and tint as an investment in yourself. The treatment typically costs $80-$150 at a salon, and a quality at-home kit costs $40-$80. Proper maintenance ensures you get the full 6-8 weeks of beautiful results.
I recommend keeping a simple checklist on your bathroom mirror for the first week:
- Oil-free cleanser? ✓
- Daily brushing? ✓
- No rubbing? ✓
- Conditioning serum applied? ✓
After the first week, these habits become automatic. My own lifted and tinted lashes consistently last the full 8 weeks because I’m religious about maintenance.
What Are the Most Common Questions About Lash Curl and Tint?
Every person considering this treatment has questions. Let me address the ones I hear most frequently and honestly.
Common questions about lash curl and tint include duration of results, maintenance requirements, safety concerns, suitability for different lash types, compatibility with other beauty treatments, cost comparisons to alternatives, and whether the process causes damage to natural lashes when performed correctly with quality products.
 </figure>
Duration and Maintenance Questions
Understanding what to expe
ct helps you decide if this treatment fits your lifestyle.<p>“How long does the lift and tint actually last?”The treatment typically lasts 6-8 weeks, depending on your natural lash growth cycle and how well you maintain them. Your lashes grow in cycles—as new lashes grow in straight, they gradually replace the lifted ones.
Factors affecting longevity:
- Natural lash growth rate (faster growth means shorter duration)
- Quality of products used
- Proper aftercare adherence
- Oil exposure around eyes
- Sleeping position
- Use of oil-based products
Some of my clients get the full 8 weeks, while others start seeing relaxation around 5-6 weeks. Individual variation is normal and expected.
<strong>”How often can I repeat the treatment?”</strong></p>
Wait at least 6-8 weeks between treatments. Your lashes need recovery time between chemical processing. Doing treatments too frequently causes cumulative damage that weakens lashes.
<p>I schedule my own treatments every 7-8 weeks. This gives my lashes adequate rest while still maintaining the lifted appearance I love.
“Can I swim or shower normally?”
After the initial 48-hour setting period, yes. You can swim, shower, exercise, and cry without affecting your lift or tint. This is one of the treatment’s major advantages—complete water resistance once set.
Safety and Suitability Concerns
Safety questions deserve thorough, honest answers.
<strong>”Is it safe to do at home?”
At-home lash lifting and tinting can be safe when you:
- Use quality kits from reputable brands
- Follow instructions exactly
- Perform proper patch testing
- Have realistic expectations about your skill level
- Don’t rush the process
However, I’ll be honest—there’s inherently more risk doing this yourself than having a trained professional perform it. You’re working with chemicals near your eyes while your eyes are closed. Having someone else do it eliminates coordination challenges.
If you’re nervous or not confident in your manual dexterity, consider having a friend help or visiting a professional for your first treatment.
“What if I have sensitive eyes?”
People with sensitive eyes can often tolerate this treatment since eyes remain closed throughout. However, if you have very reactive skin or eyes, proceed with extra caution.
Always perform the 48-hour patch test. If you react to the patch test, don’t proceed with the full treatment. It’s not worth risking your eye health.
“Can I do this if I wear contacts?”
Yes, but remove your contacts before starting. You can reinsert them after the treatment is complete and you’ve thoroughly rinsed any residual products.
“Will it damage my natural lashes?”
When done correctly with quality products and appropriate timing, no. The treatment should not cause damage. However,</strong> over-processing, using harsh formulas, or doing treatments too frequently can weaken lashes.
That’s precisely why following timing guidelines exactly and waiting appropriate intervals between treatments is so important.</p>
Product and Cost Questions
Practical considerations matter when dec
iding if this treatment is right for you.
“Where can I get a good quality eyelash lift kit?”
Quality at-home kits are available from several sources:
Online Beauty Retailers:
Major online beauty retailers carry various brands. Read reviews carefully and look for kits with comprehensive instructions and quality ingredients.
Professional Beauty Supply:
Some professional beauty supply stores sell at-home kits. These often have higher quality standards than general retail kits.
Specialized Lash Product Suppliers:
Companies specializing in lash products often offer both professional and at-home kits. At UBLash, we provide professional-grade lash lift supplies and can guide you toward appropriate products for your needs [3][5].
What to Look For:
- Complete ingredient lists
- Clear instructions with photos
- Multiple shield sizes
- Positive reviews from actual users
- Responsive customer service
- Safety certifications
“How much does an at-home kit cost versus salon treatment?”
At-Home Kits:
Quality at-home kits typically range from $40-$80 and provide 3-5 applications (depending on the kit). This breaks down to approximately $10-$25 per treatment.
Salon Treatments:
Professional salon lash lift and tint services typically cost $80-$150 per treatment, varying by location and salon reputation.
Cost Comparison:
If you perform your own treatments every 8 weeks:
At-home cost per year: approximately $65-$150 (6-7 treatments)
Salon cost per year: approximately $520-$975 (6-7 treatments)
The savings are significant, but remember you’re trading cost savings for professional expertise and reduced risk.
“Can I wear mascara after the treatment?”
Yes, after the 48-hour setting period. However, most people fi
nd th
ey don’t want or need mascara anymore. <strong>This is because the lifted, tinted lashes already create the defined look mascara provides.
That said, if you do choose to wear mascara occasionally, use water-based formulas and remove them gently with oil-free remover each night.
Potential Risks and How to Avoid Them
Being aware of potential problems helps you prevent them.
“What can go wrong?”
Potential issues include:
“How do I avoid these problems?”
Prevention Strategies:
Perform Patch Tests:
Always test products 48 hours before use.1</sup> Apply small amounts of both lifting solution and tint to your inner elbow and monitor for reactions.
Follow Timing Exactly:
Set timers and check them frequently. Never guess at processing times or exceed recommended maximums.>2
Work Clean and Organized:</strong>
Have everything prepared before starting. Clean hands and tools prevent contamination and infections.
Position Carefully:
Take time ensuring proper shield placement and lash positioning. Rushing this step causes uneven results.
Protect Skin:
Use provided eye pads or carefully applied petroleum jelly on eyelid skin near lashes to prevent tint staining.
Stay Calm: If any solution gets in your eyes, flush immediately w
ith clean water.For this reason, it’s essential to keep saline eye wash nearby just in case.
<strong&g
t;Know Your Limits:</strong> If something feels wrong or you’re uncomfortable at any point, stop the treatment. Remember, it’s better to rinse everything off early than risk damage.Foster Positive Client Relationships: <strong>Moreover, foster positive client relationships by providing exceptional cust
omer service [3]. In fact, even when you’re your own client, treat yourself with the same care and attention you’d give som
eone else.
Conclusion
Achieving perfect lash curl and tint at home is completely possible with quality products, proper technique, and careful attention to safety. The time and money savings make it an attractive option for many people.
Continuous improvement through regular evaluation of your technique and results helps you provide the best possible outcomes [6]. Stay passionate and motivated throughout your learning process [6]. With practice, you’ll master this treatment and enjoy beautiful, low-maintenance lashes for years to come.
Ready to start your lash lift journey or need professional-grade supplies? Contact me at contact@universebebautylashes.com or visit www.ublash.com. We provide quality lash products and expert guidance to help you achieve salon-quality results at home.
-
-
-
- “[PDF] UNC Department of Dermatology Pre-Visit Instructions”, https://www.med.unc.edu/derm/wp-content/uploads/sites/511/2017/11/contact-dermatitis-pre-visit.pdf. Patch testing is a widely recommended method to identify potential allergic reactions to cosmetic products. Evidence role: expert_consensus; source type: education. Supports: Performing patch tests 48 hours before use can help identify allergic reactions to lifting solutions and tints.. ↩</a> “footnote”>↩
-
-